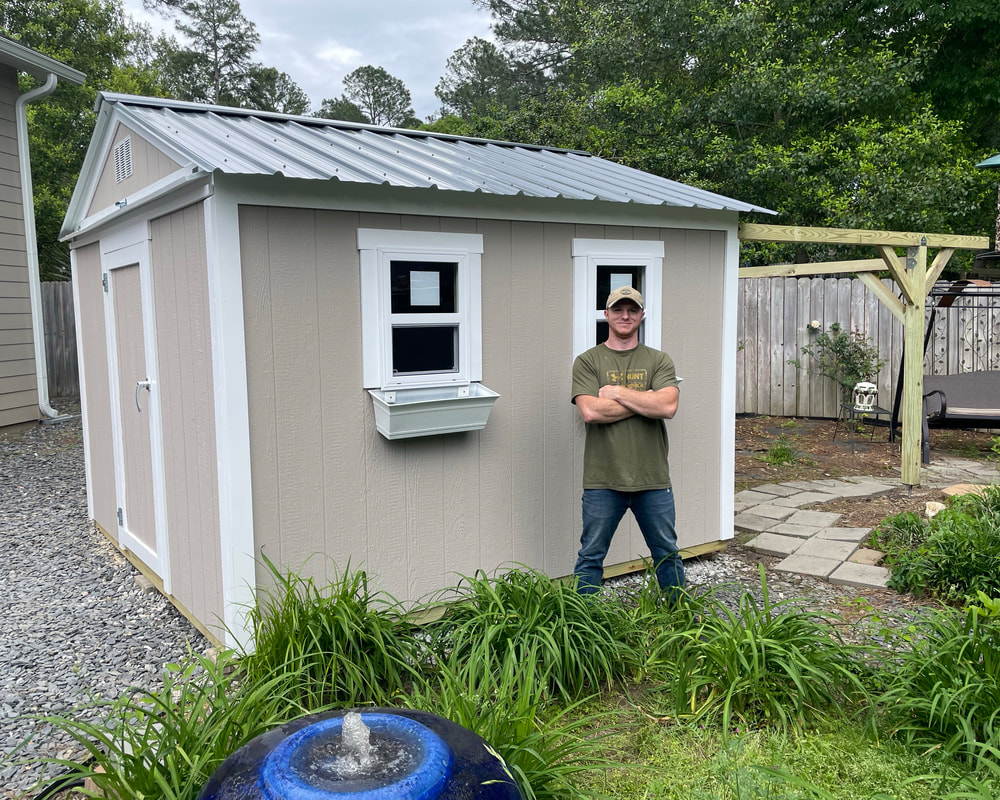
I needed a neighborhood friendly approach to having an observatory in my backyard that looked like a nice garden shed (but with a roll-off roof). I purchased SkyShed plans from SkyShed Observatories and selected their 10’x10’ plan. The plans have great step by step details which enabled me to hire Austin Barnes who had very good shed construction experience and enjoyed the challenge of this unique SkyShed design. He obtained most of the materials locally and built it on site in my backyard in approximately 2 weeks of work. We used pressure treated lumber for the construction, which was readily available and typically used in our area.
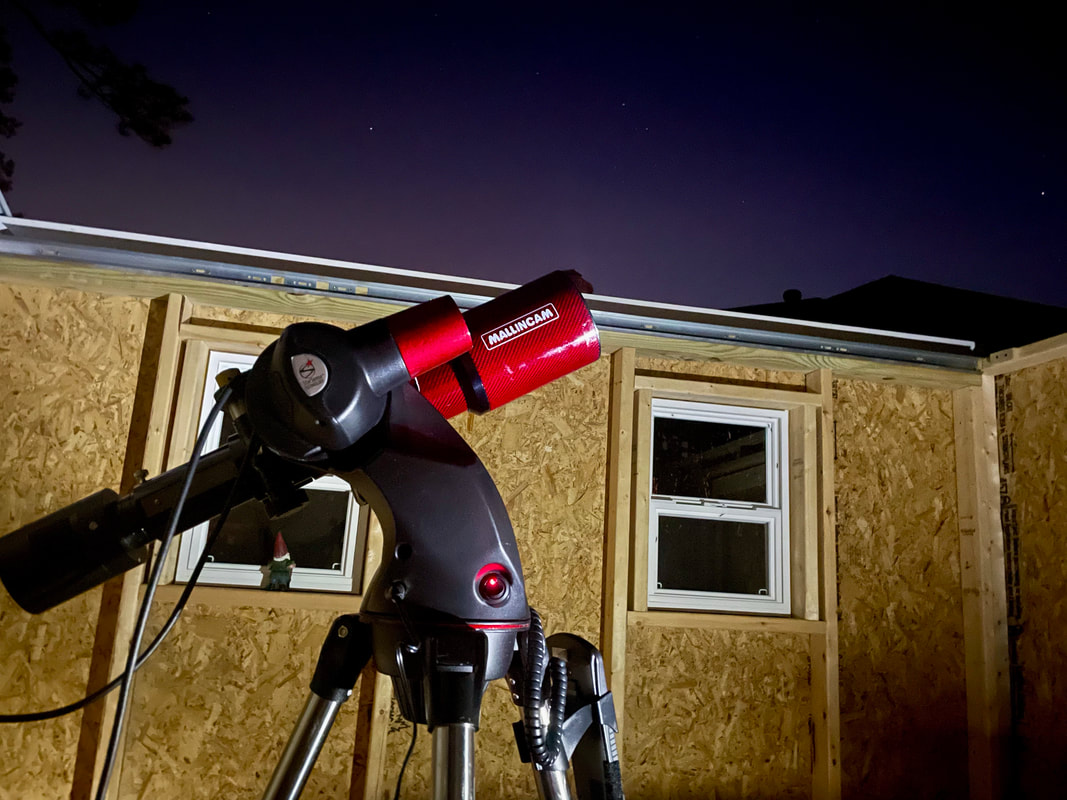
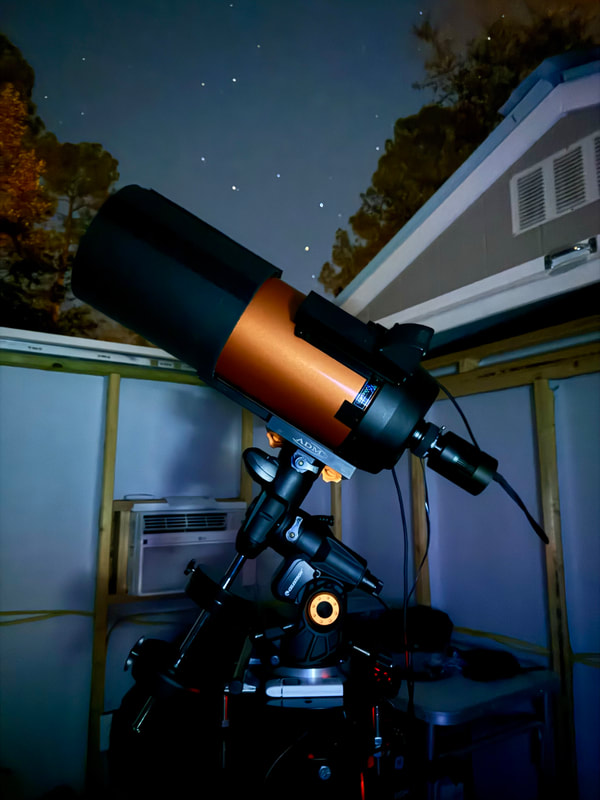
The result of my prior blog “Step 1 – Install a Pier” is shown below on the left with a fully operational pier, mount and telescope in my backyard.
The result of my prior blog “Step 1 – Install a Pier” is shown below on the left with a fully operational pier, mount and telescope in my backyard.
 |  |
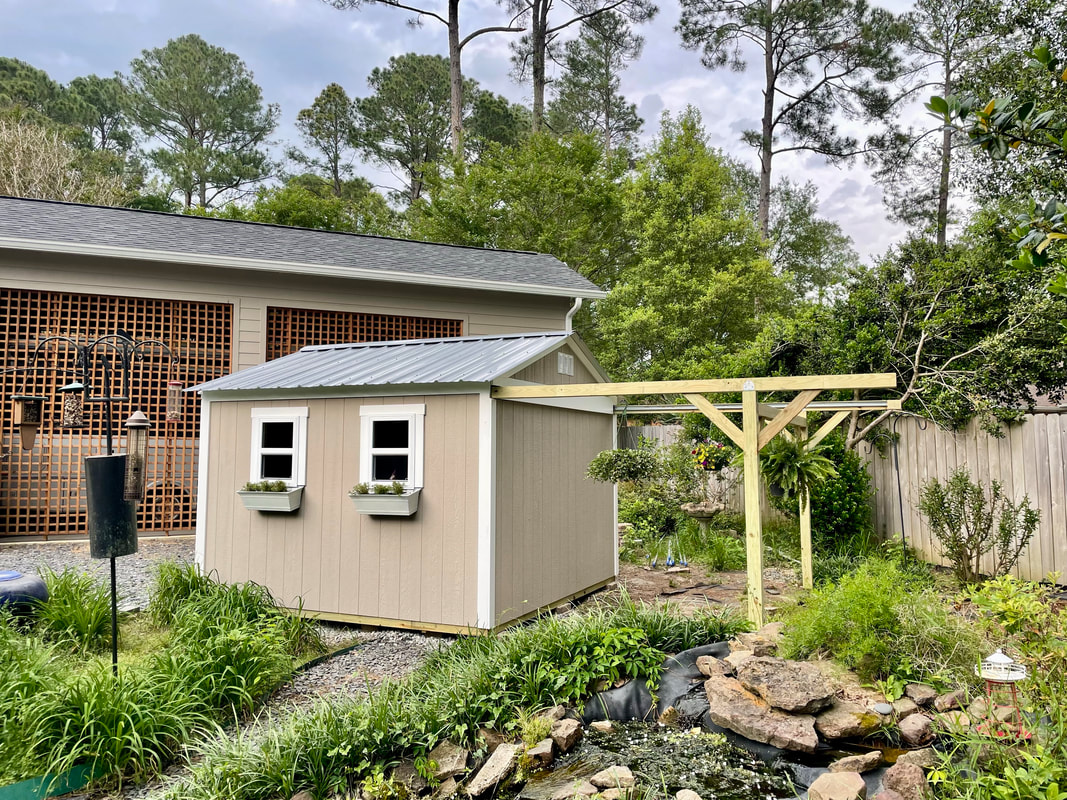
Although it was great having a pier, a backyard observatory was still my goal. The concept illustration of a SkyShed observatory is shown on the right. The trellis attached to the SkyShed provides the rails needed when rolling off the roof.
This following is a pictorial walk through showing how a SkyShed was constructed in my own backyard…
This following is a pictorial walk through showing how a SkyShed was constructed in my own backyard…
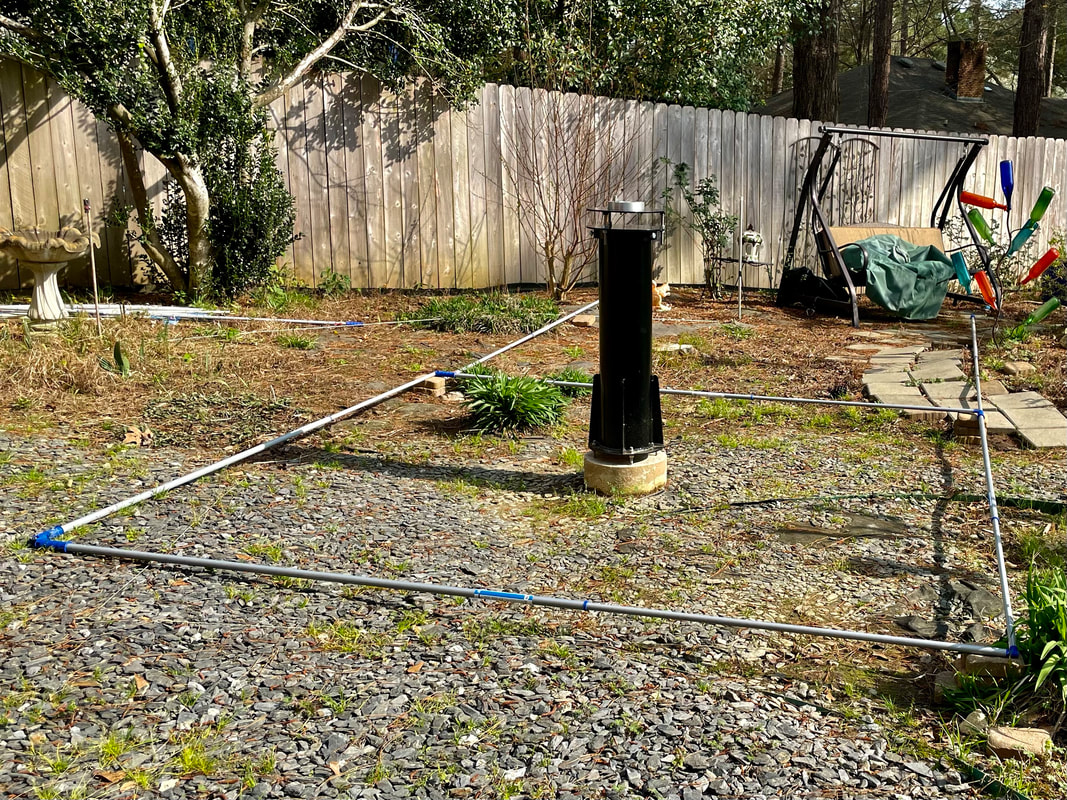 |  |
Since the concrete pier is an immovable object, you need to carefully plan how the SkyShed and trellis will be oriented on your site around the pier. Painter’s poles from Lowe’s were very helpful planning my layout. I originally thought I would build an 8’x10’ building, but then realized I could build a 10’x10’ with the pier offset a foot from center and still have the same space around the mount plus some extra room. I picked the angle orientation so the roof rails at the back stopped right at the required setback from the fence. There are tall pine trees behind the back fence, so it also made sense for the roof to slide back toward the fence since I would never view in that direction.
 | 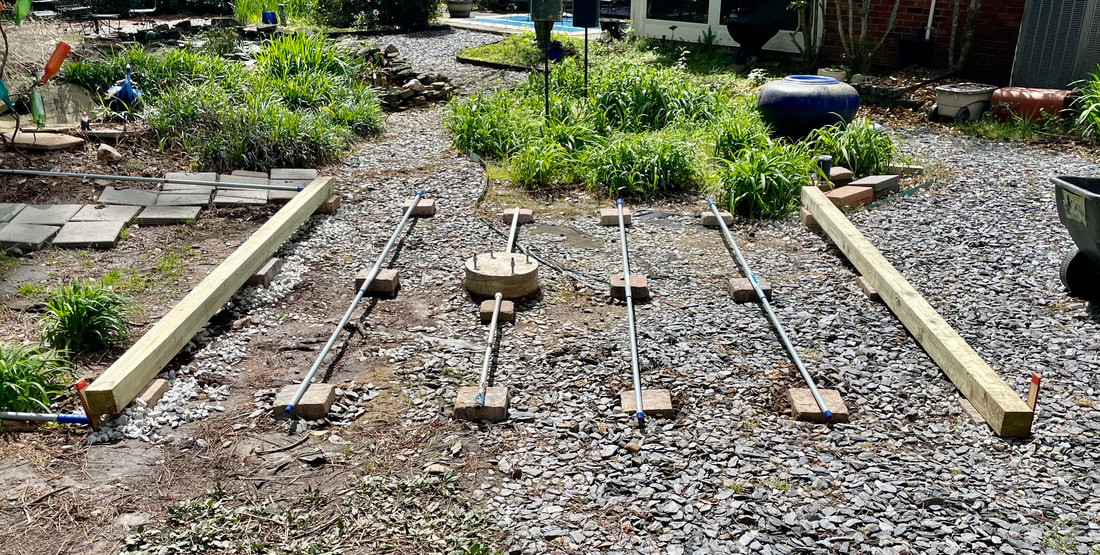 |
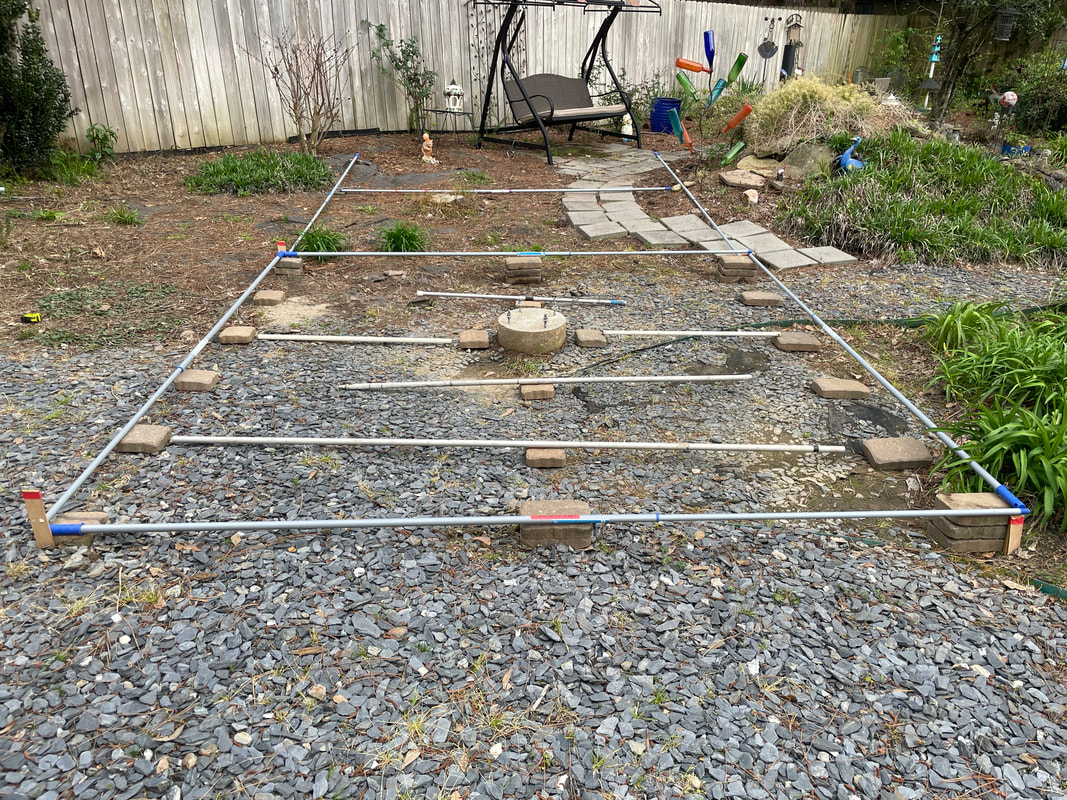
I knew I would have to get help to build the SkyShed, but I figured I could buy and place all the blocks in the right places and level them with one another myself before the construction began. My site has a slight downward slope that required more blocks on the low end, but the slope provided good drainage so no water would accumulate under the SkyShed.
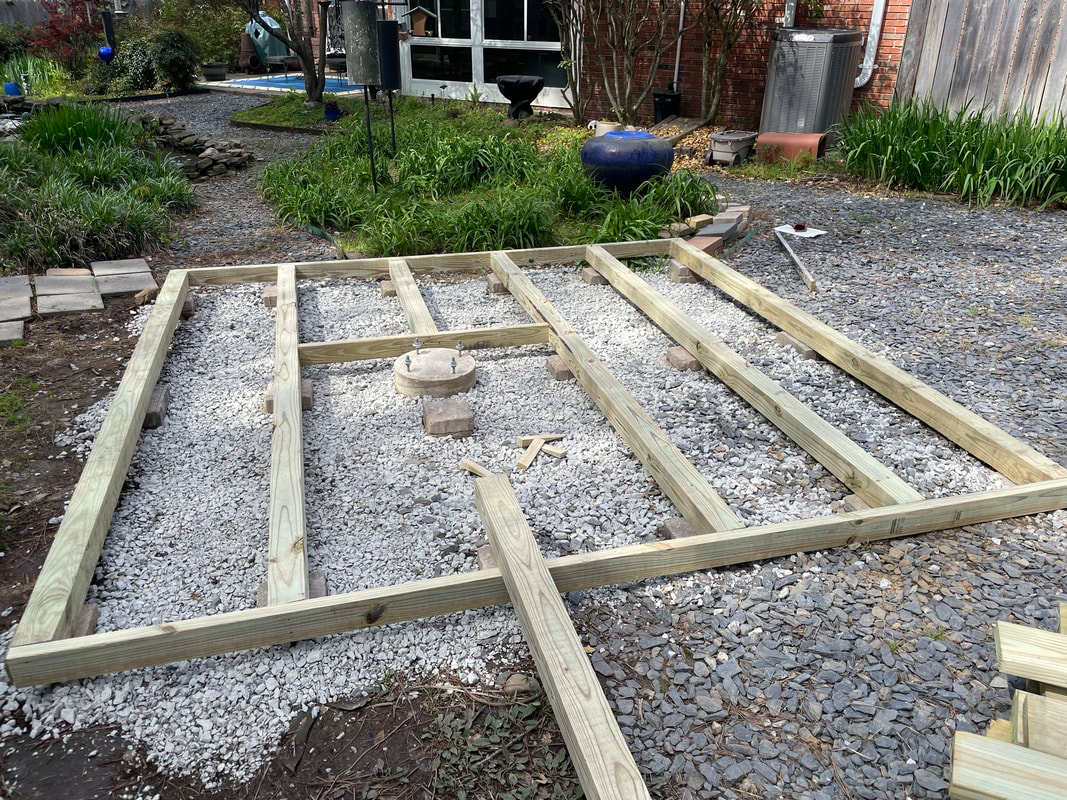 | 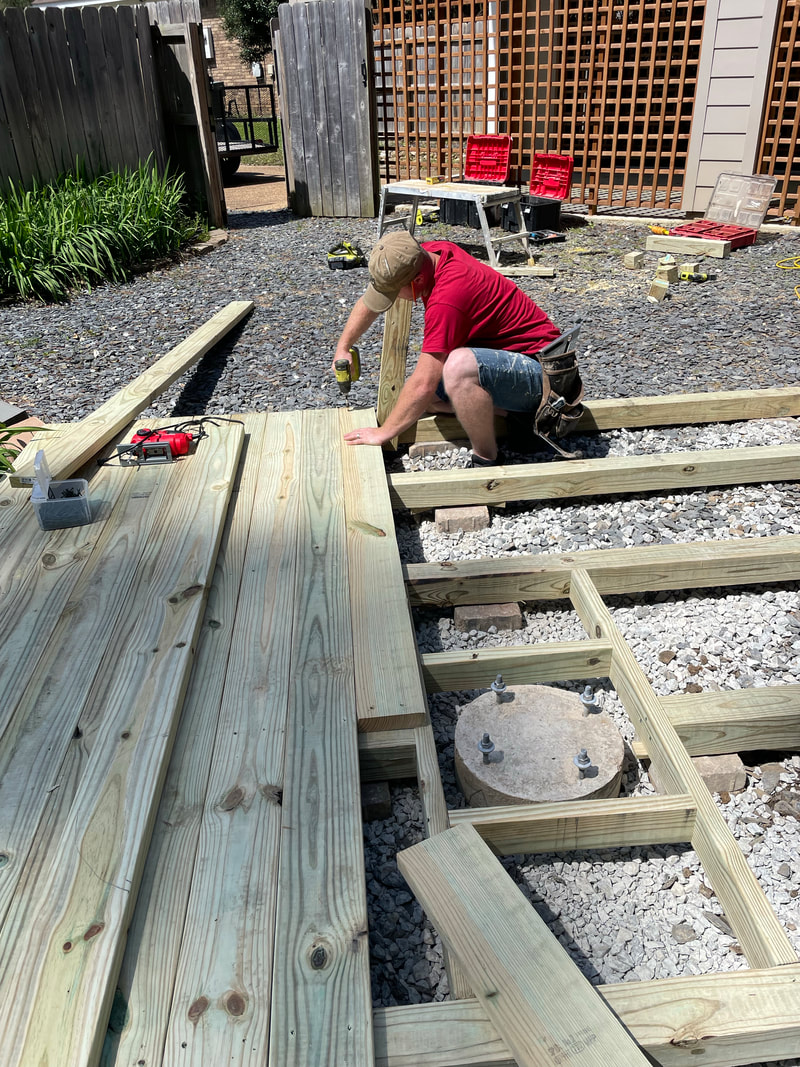 |
I also bought and added a layer of drainage rock around the support blocks before construction began to ensure it drained well. Work began by installing and squaring up all the 4”x4” supports. Then the floor planks were nailed onto the supports making a very rigid and solid floor.
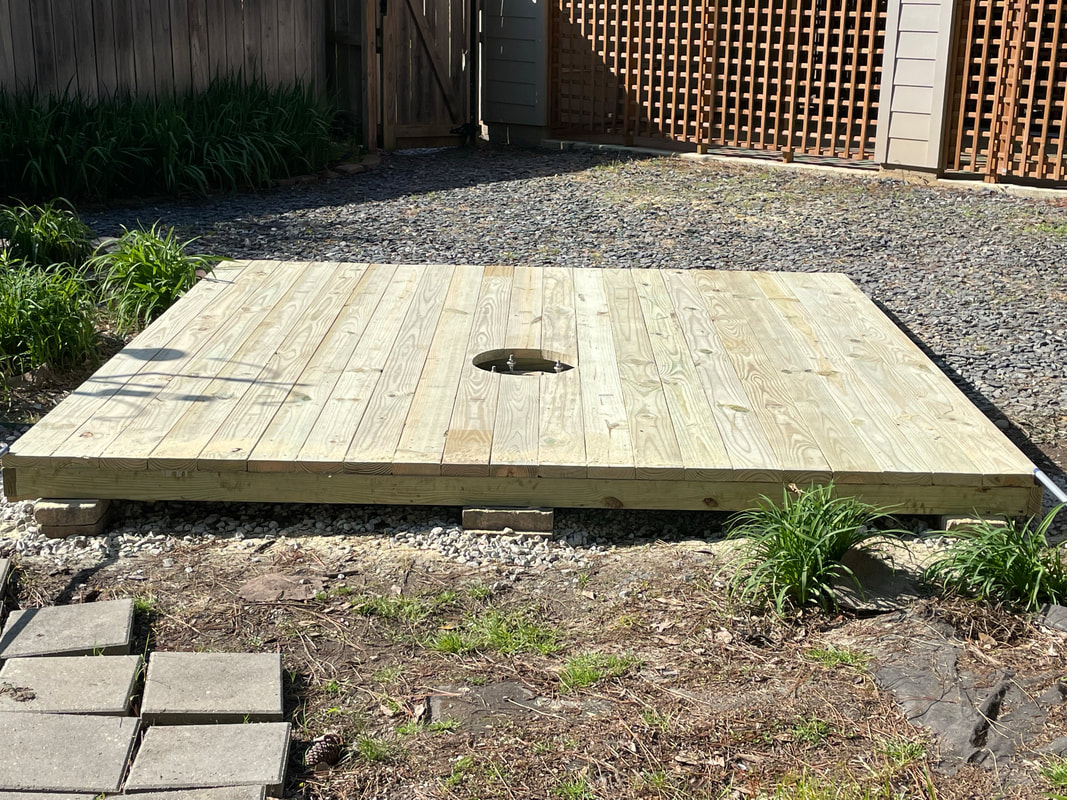 | 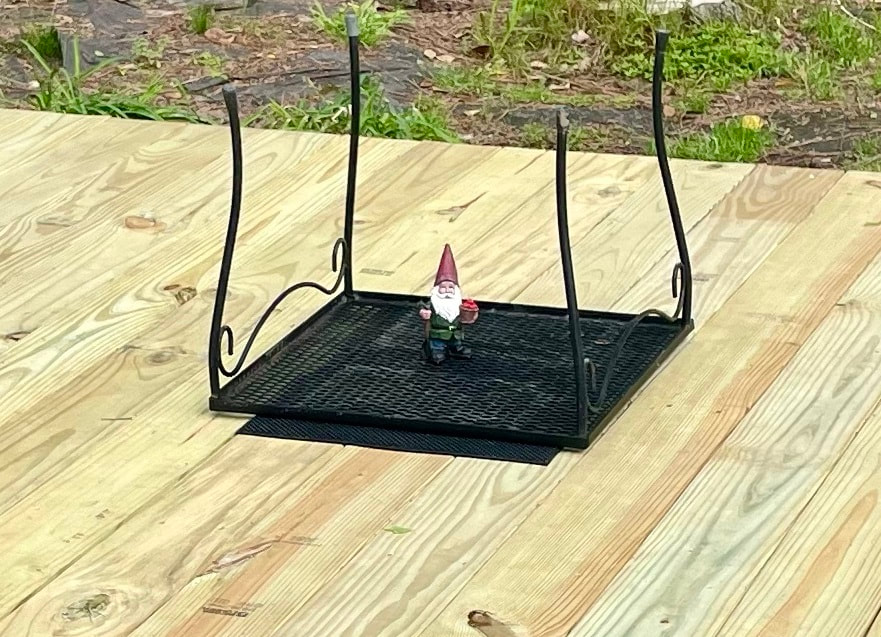 |
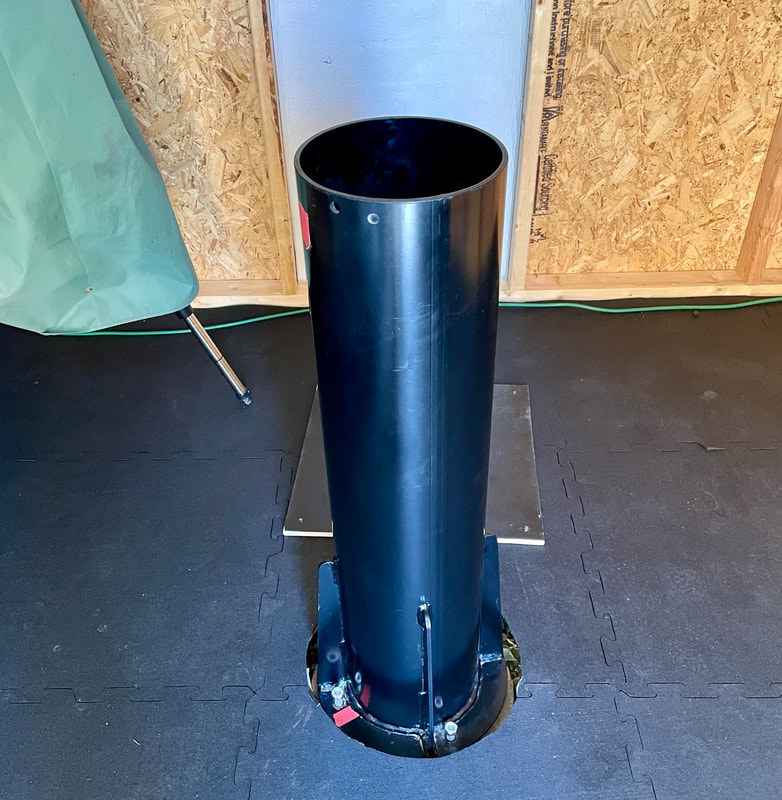
A circular hole was cut around the concrete pier to allow the metal pier to be bolted down and isolated from the flooring. I realized that having a hole in the floor would be a construction hazard, so I put a small table upside down over it to avoid accidentally stepping in the hole. I also assigned a yard gnome to warn others not to step there.
 | 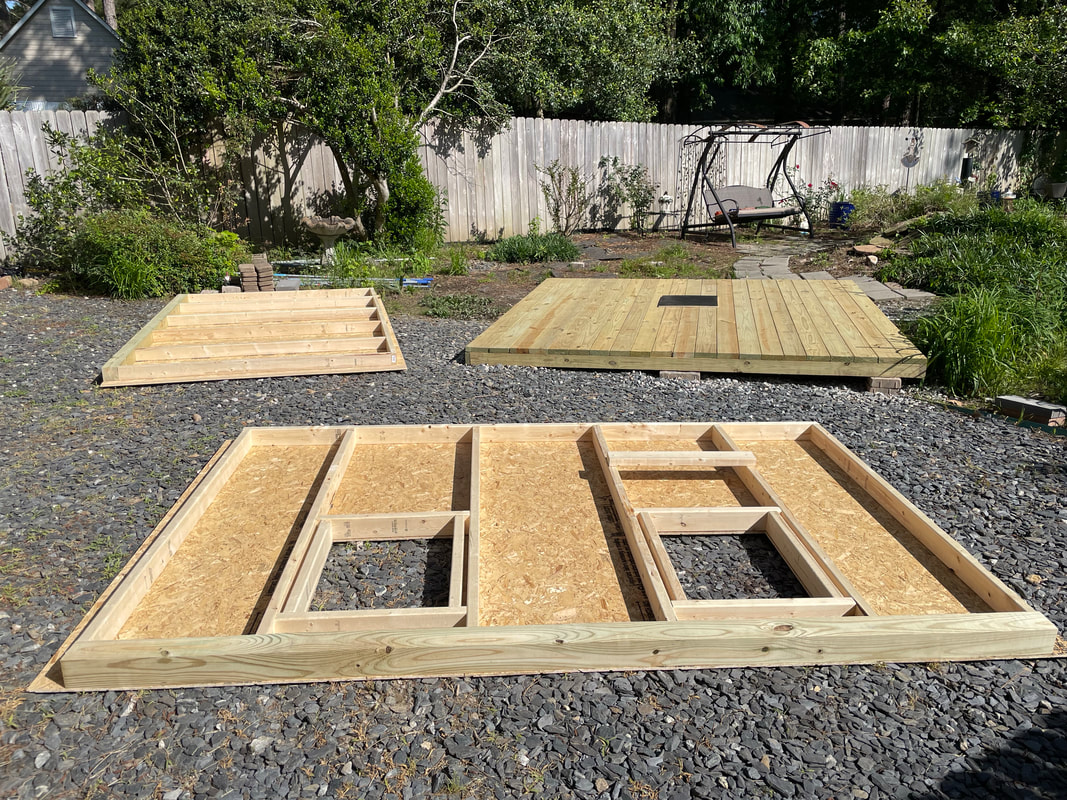 |
Using the plans, the 4 sides and 2 gables were constructed in our garage and smart siding nailed to them while the panels were lying down. Each side panel was adjusted to be square before nailing on the siding. The side panels were then carried into the back yard next to where the floor had been installed. The gnome kept falling asleep, so I replaced him and the table with a piece of plywood painted black and screwed to the floor over the pier hole so you could safely step where the hole was.
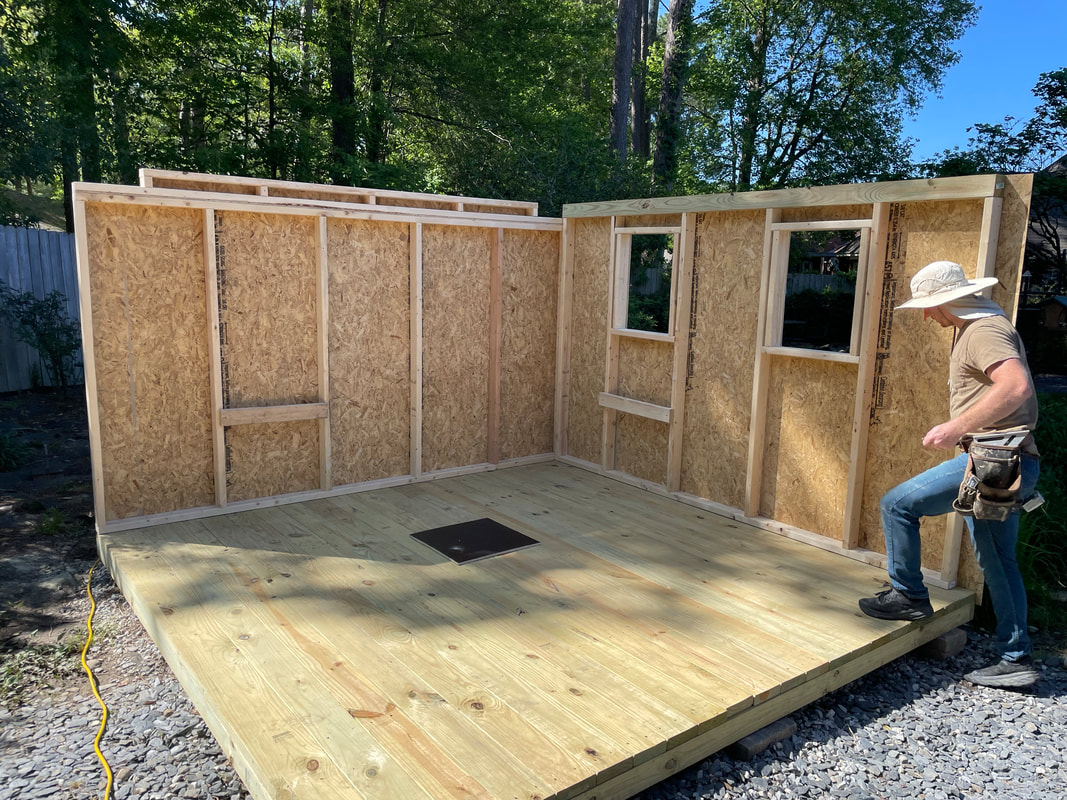 |  |
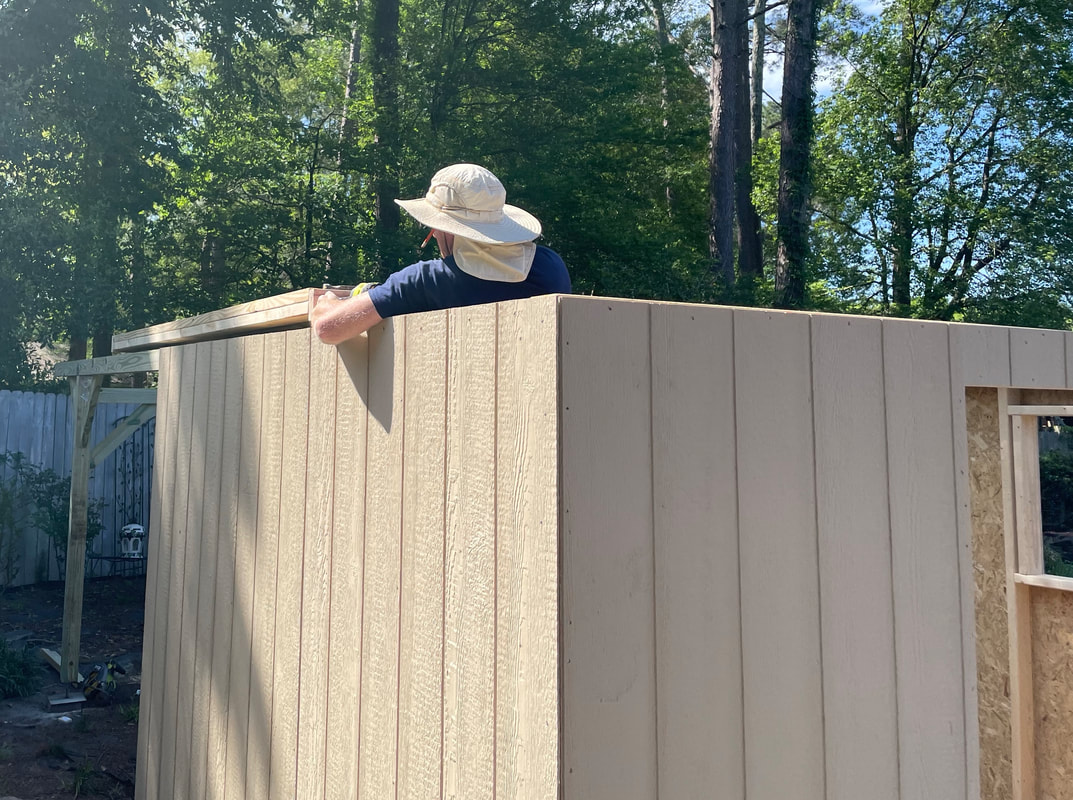
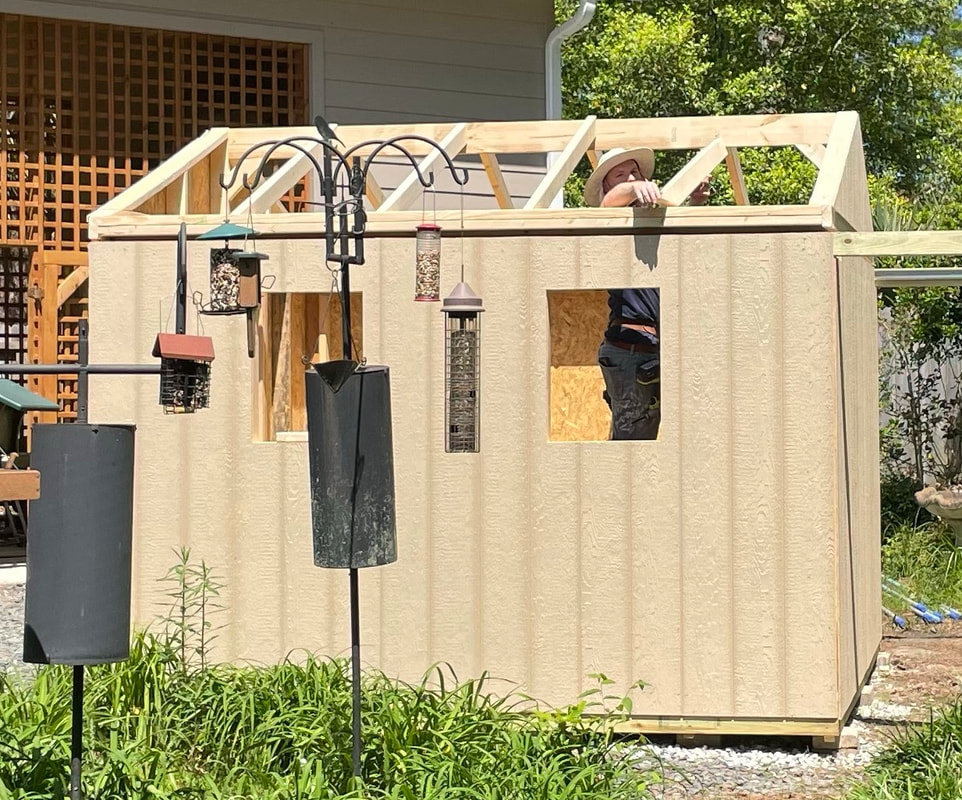
Now we were ready to install the 4 sides that had been built. I played an important role by holding the first wall in place while he raised and nailed the adjoining wall in place. I also helped with placing and holding the other walls when they were installed.
 | 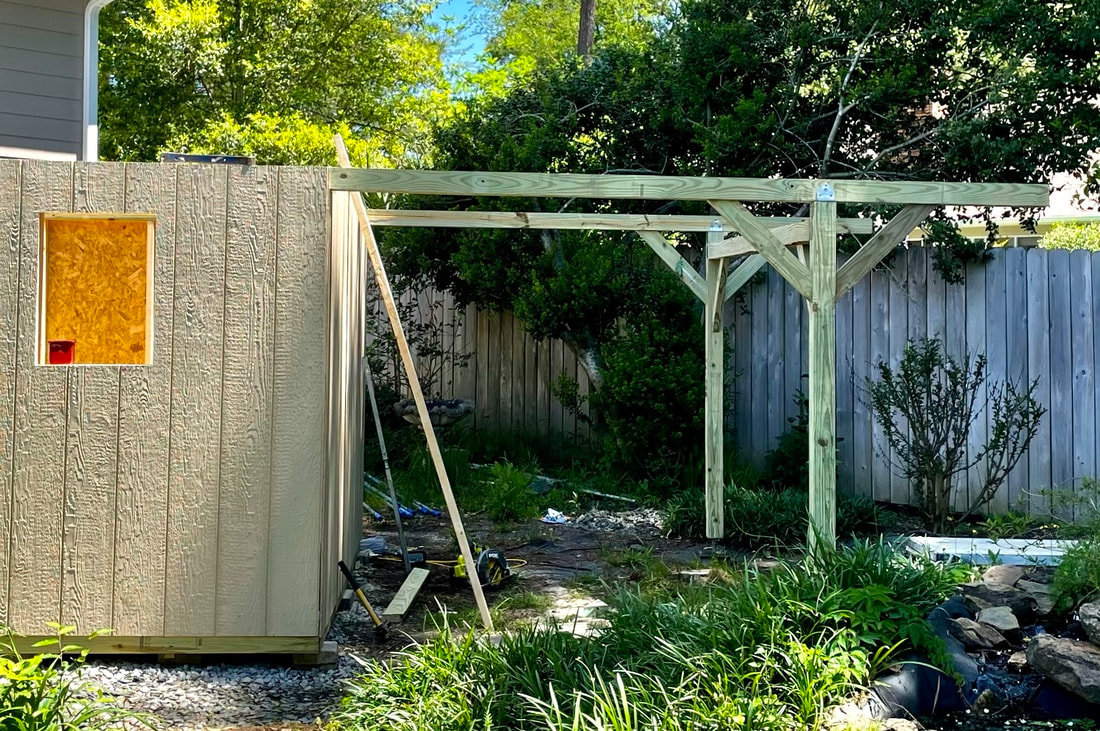 |
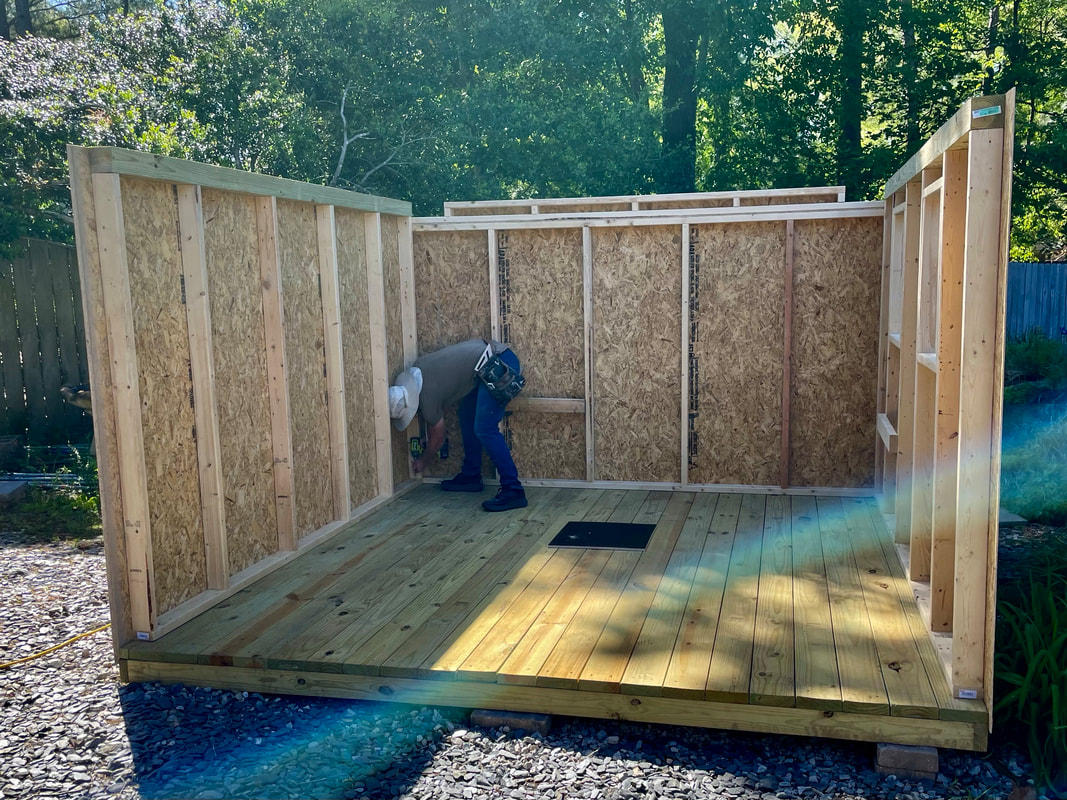
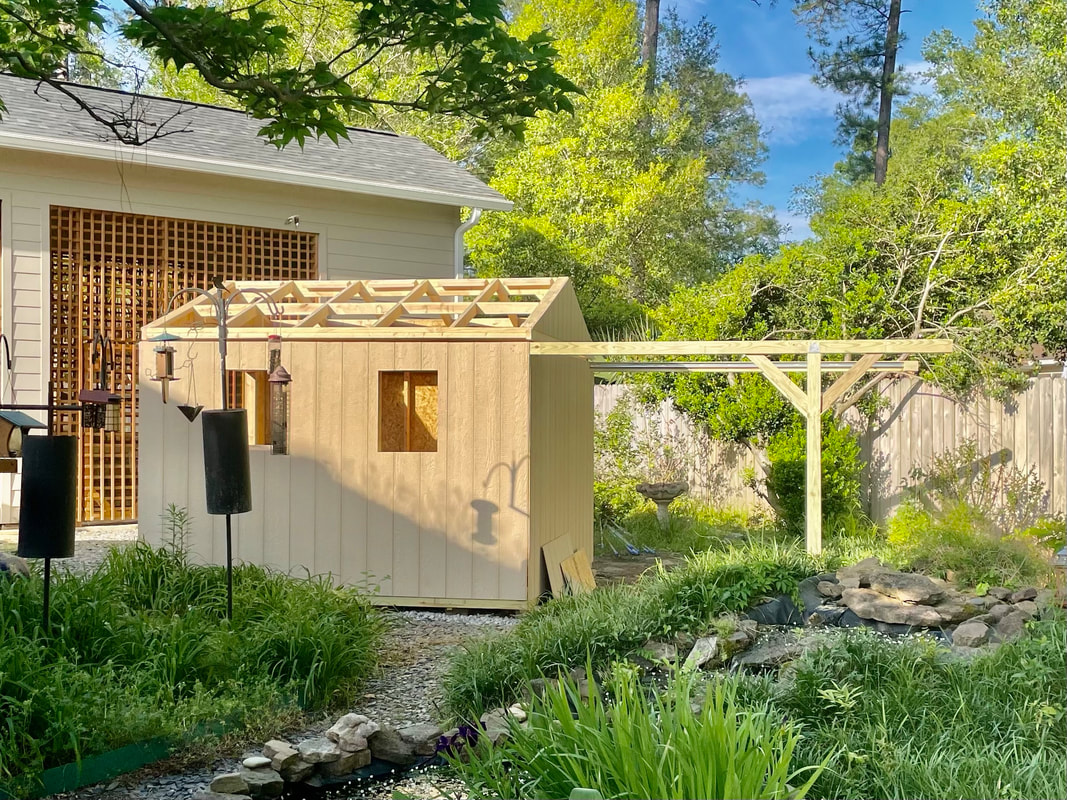
Once all 4 walls were in place and secured, the trellis supports were added in back with tracks that would enable the roof to roll off from the shed.
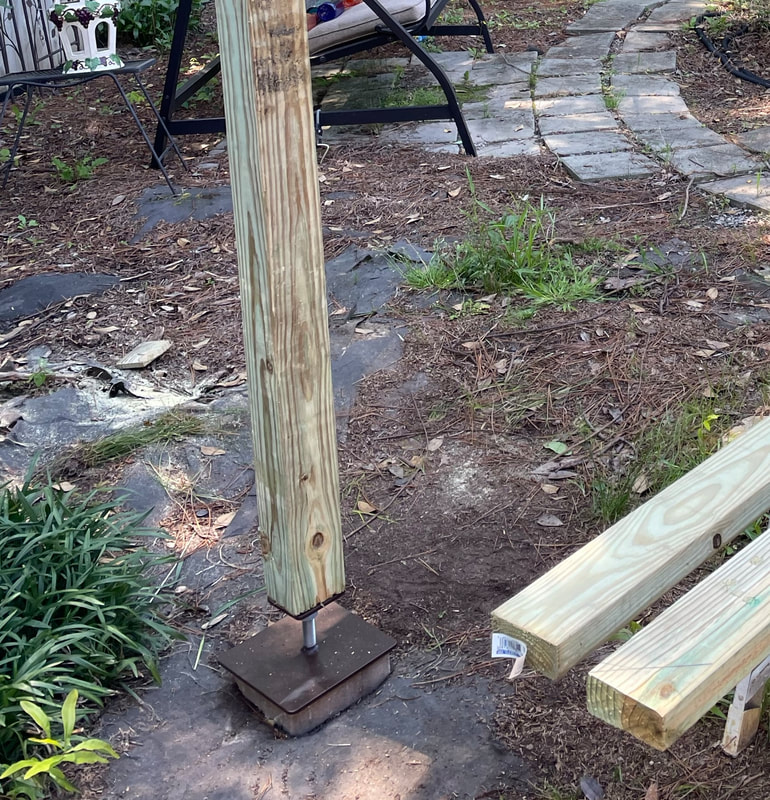 | 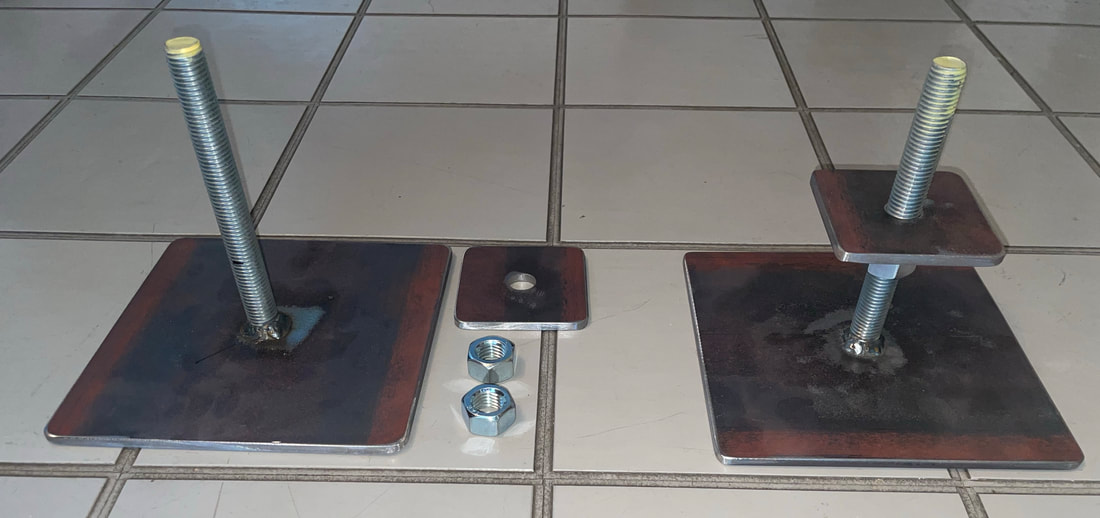 |
The plans show how to make an adjustable “foot” for the two back support poles that allow you to easily adjust them by turning a nut to make both posts level with the shed and with each other. My son-in law built the adjustable foot for each pole according to the plan specifications and they work great! You can easily adjust them as needed over time to ensure the structure remains level.
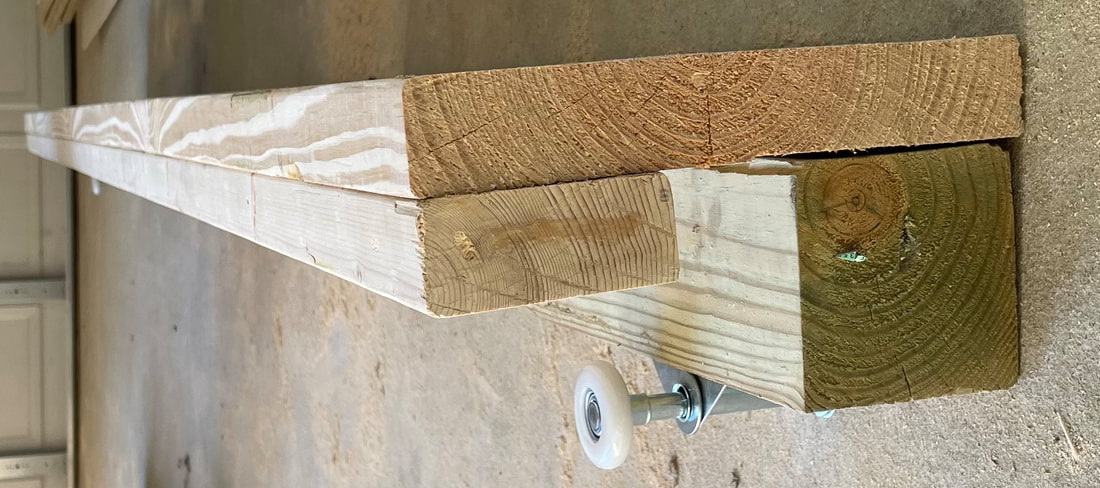 |  |
Next the massive roof support rails were built, and a roller installed at each end (the left photo is rotated to match the perspective of the installation picture). This was lifted up into place (with 2 people) and carefully inserted into the side rails. The portion that extends out over the rollers wind up extending out over the side walls when installed as shown in the picture on the right. Once the rail is in place the remaining rollers are inserted and installed at the appropriate spacing between the two end rollers.
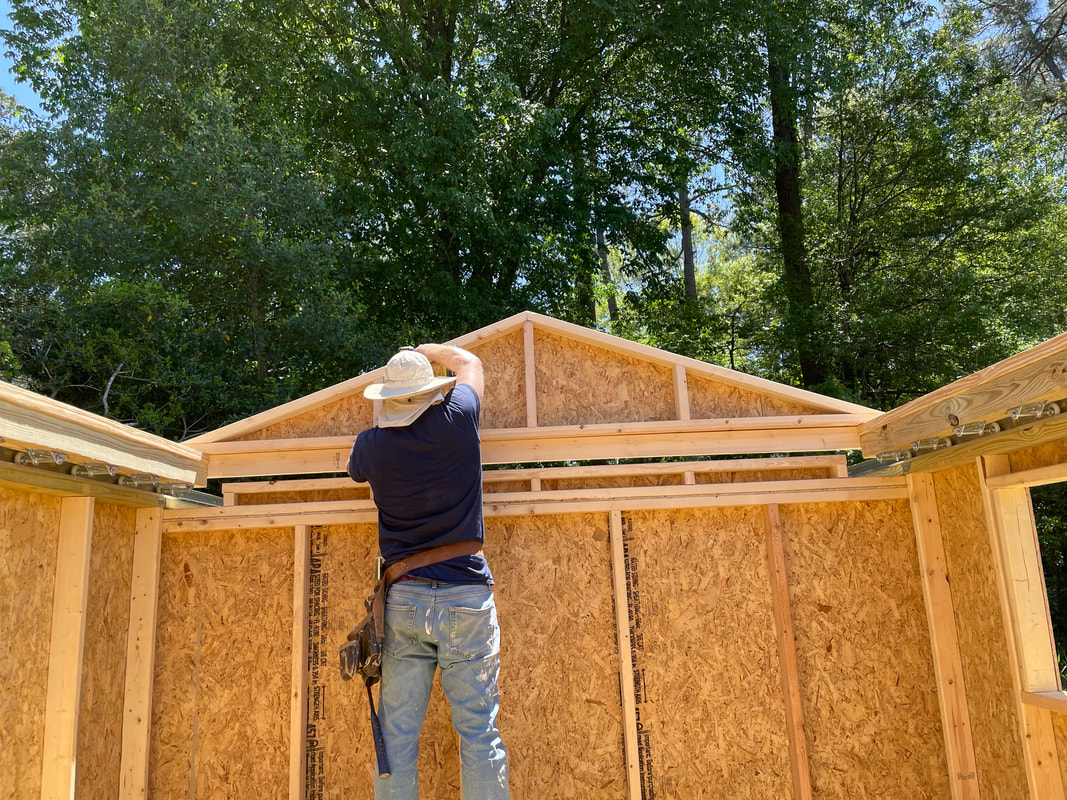 |  |
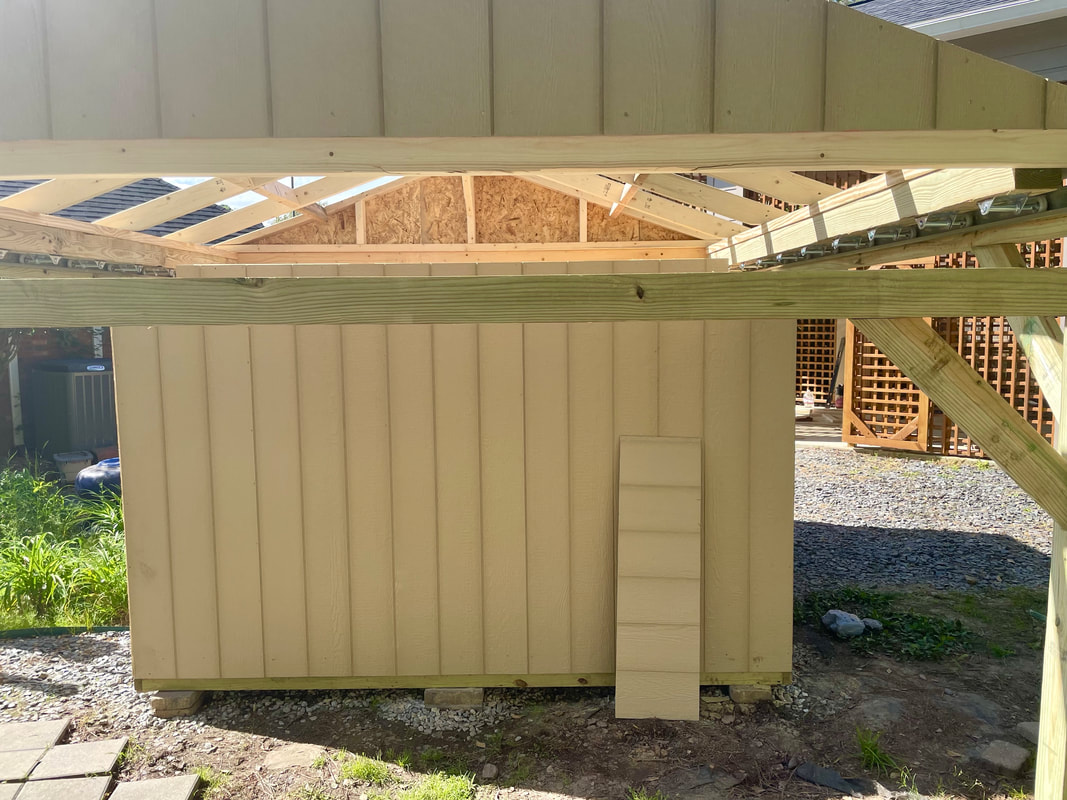
The two roof support rails were then rolled into position over the walls and the rear gable was lifted into place and installed. Then the front gable was installed, making the square rolling roof frame a single unit.
 |  |
The top cross beam was installed stabilizing the roof structure. The side rafters were then installed that would support the metal roof.
 | 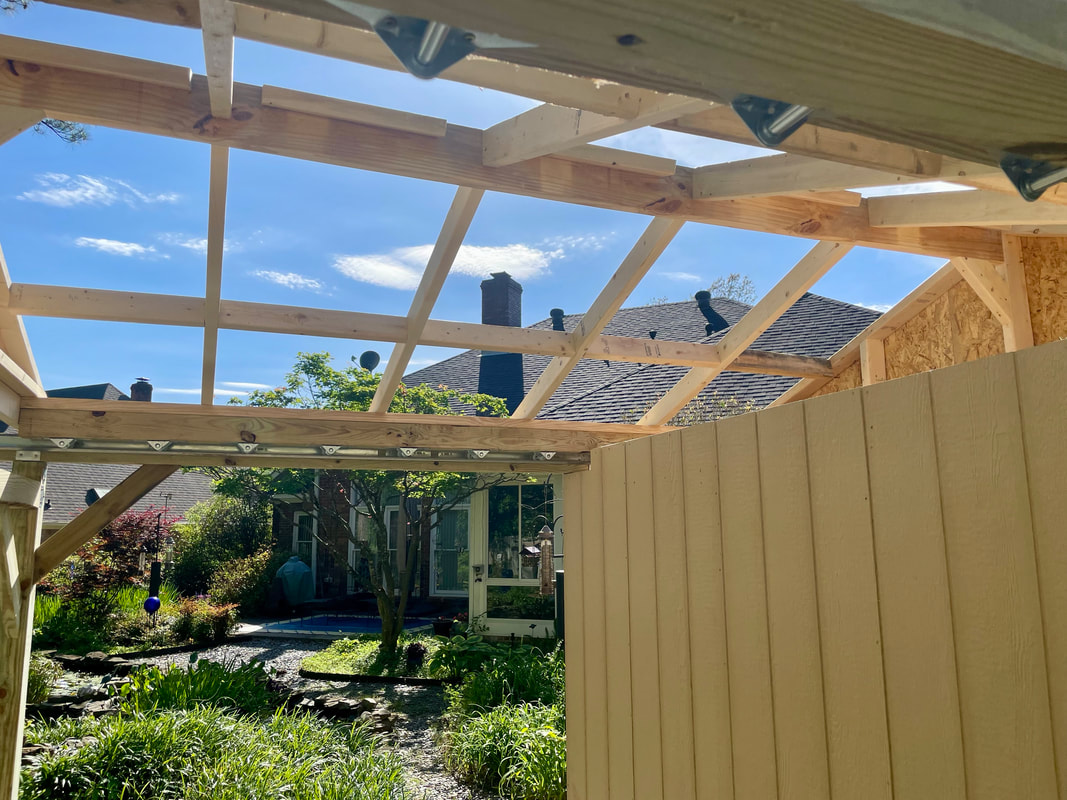 |
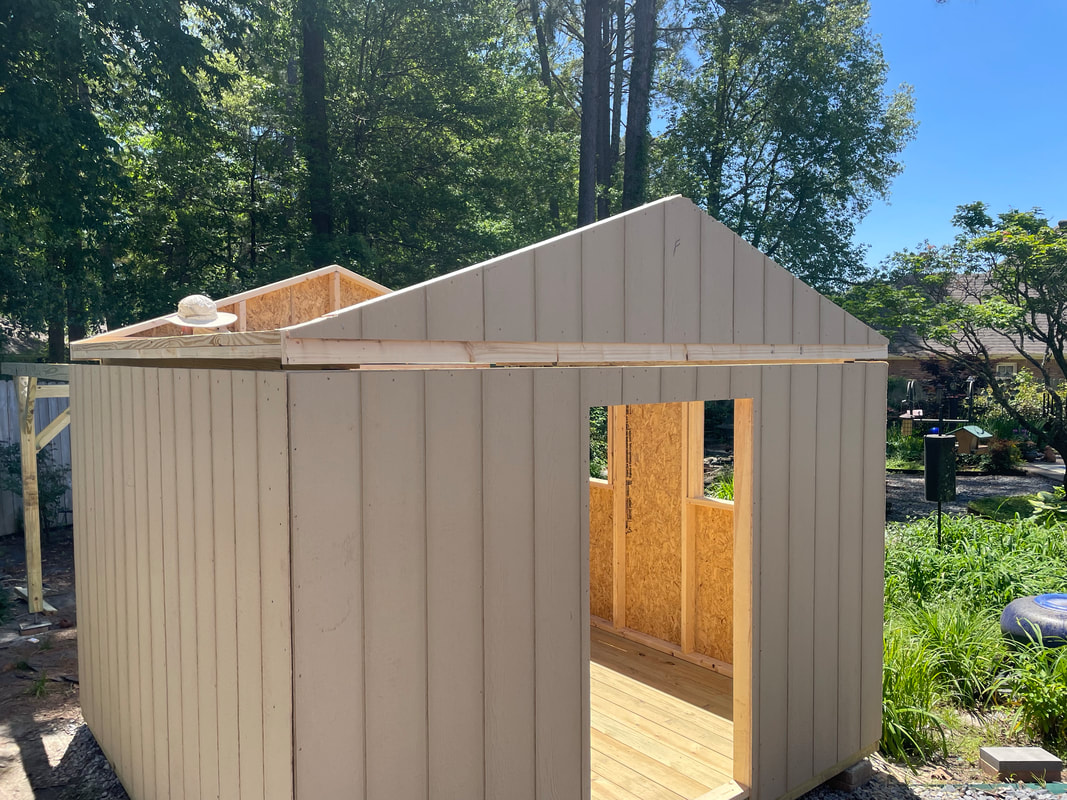
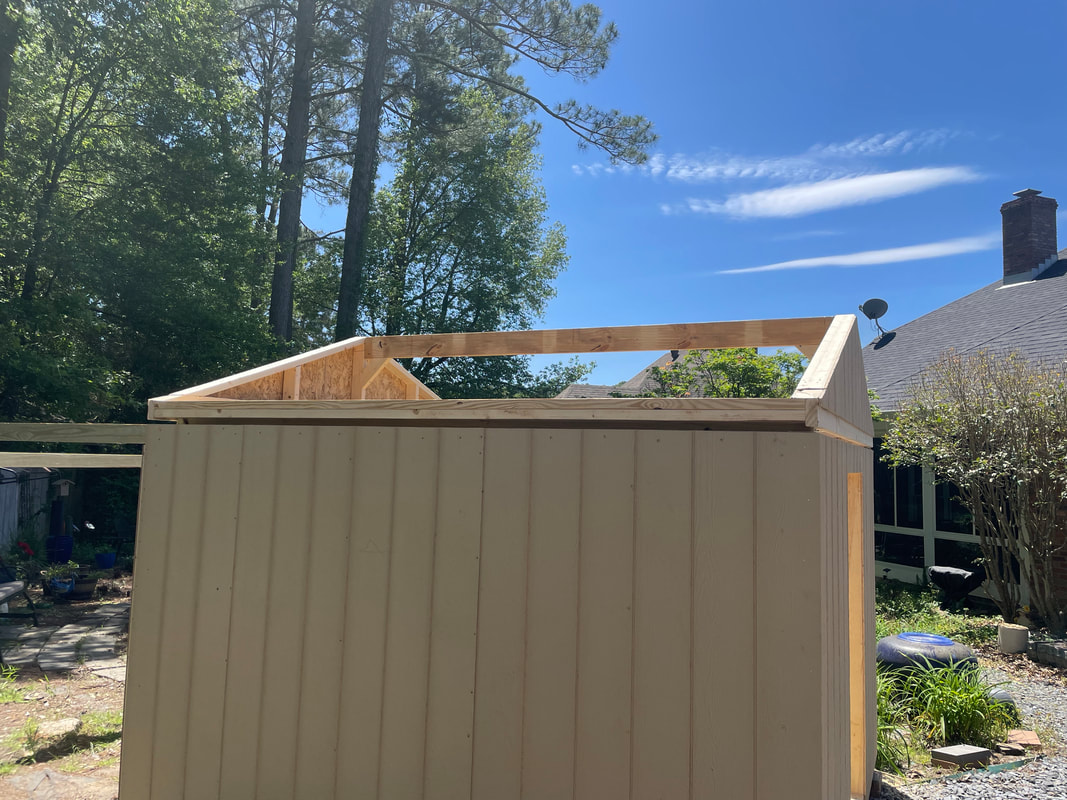
The roof structure could now be rolled back onto the trellis to make it easier to install additional roof supports as needed.
 | 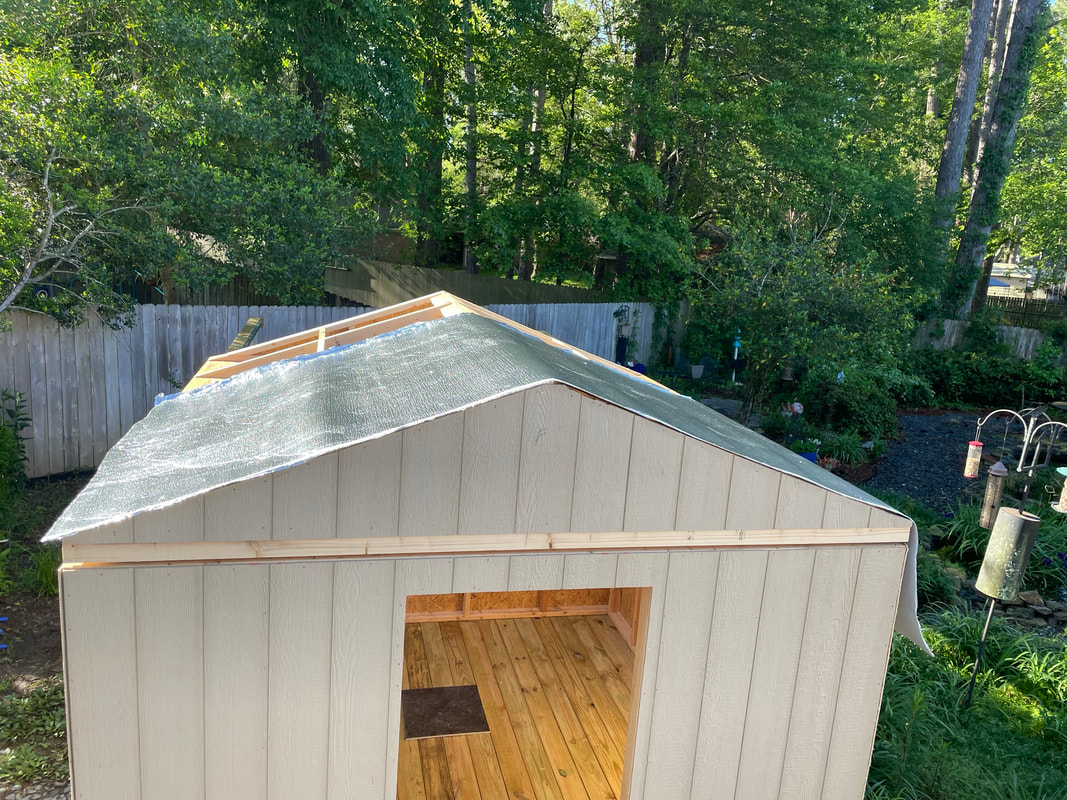 |
The completed roof structure was then rolled back onto the shed to enable roofing felt to be installed over the trusses. However, instead of roofing felt, I obtained locally a thin Low-E Peel & Stick 1/8” R10 insulation roll for tin roofs that was stuck into place over the trusses with the metal reflective side up and cut to fit.
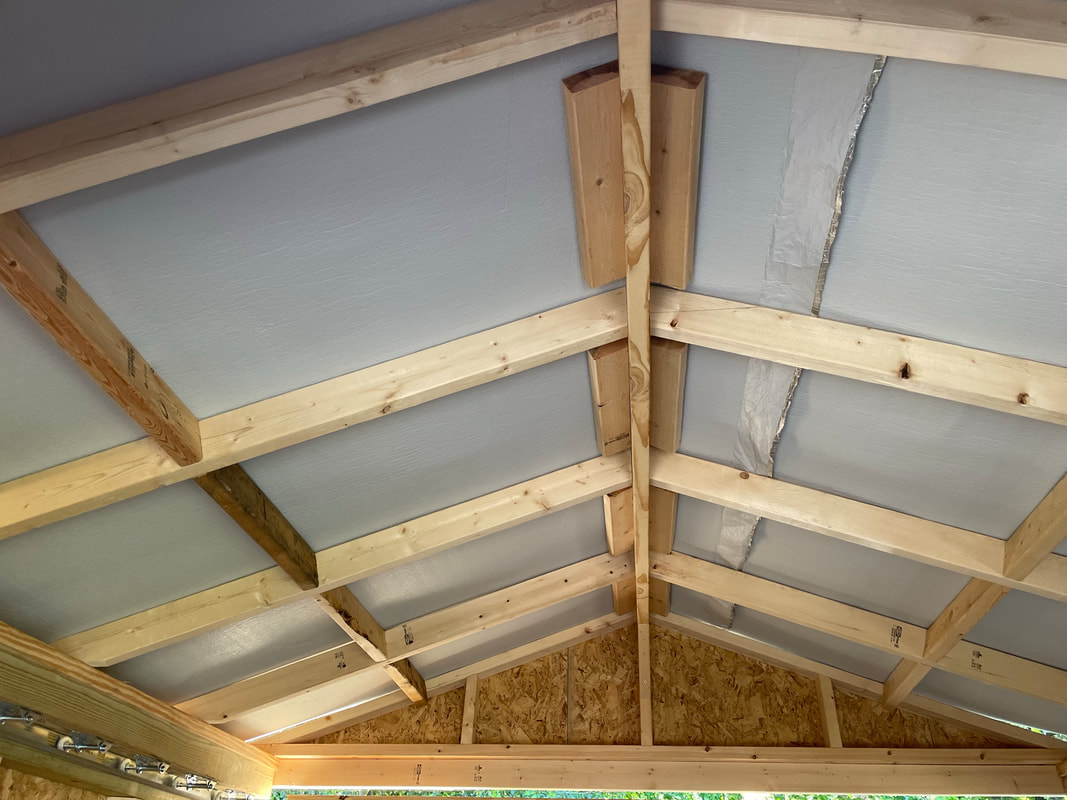 | 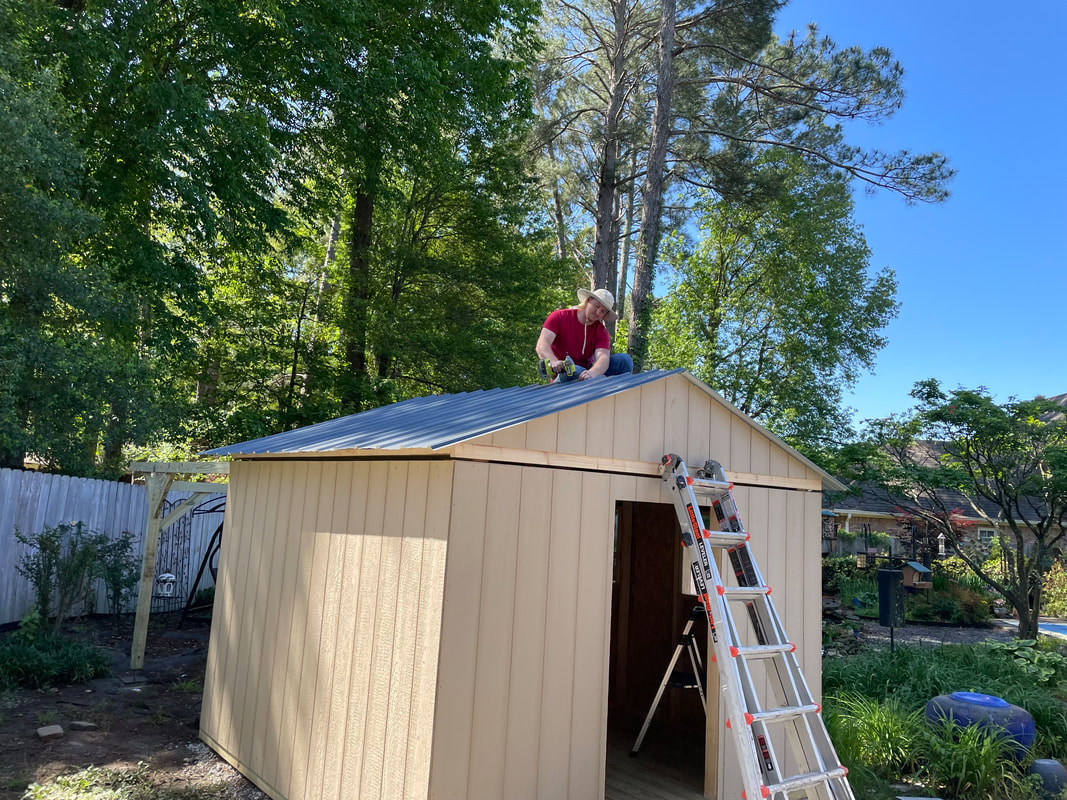 |
The underside of the tin roof insulation is white as shown in the picture on the left. Next the metal roof was put in place on top of the insulation and nailed into the roof support trusses.
Side note: I had plenty of this insulation left over and later used it on the inside walls and roof gables between the studs with the reflective side against the wall and the white side toward the inside. This provided an effective insulation layer on all the walls that was both thin and neat.
Side note: I had plenty of this insulation left over and later used it on the inside walls and roof gables between the studs with the reflective side against the wall and the white side toward the inside. This provided an effective insulation layer on all the walls that was both thin and neat.
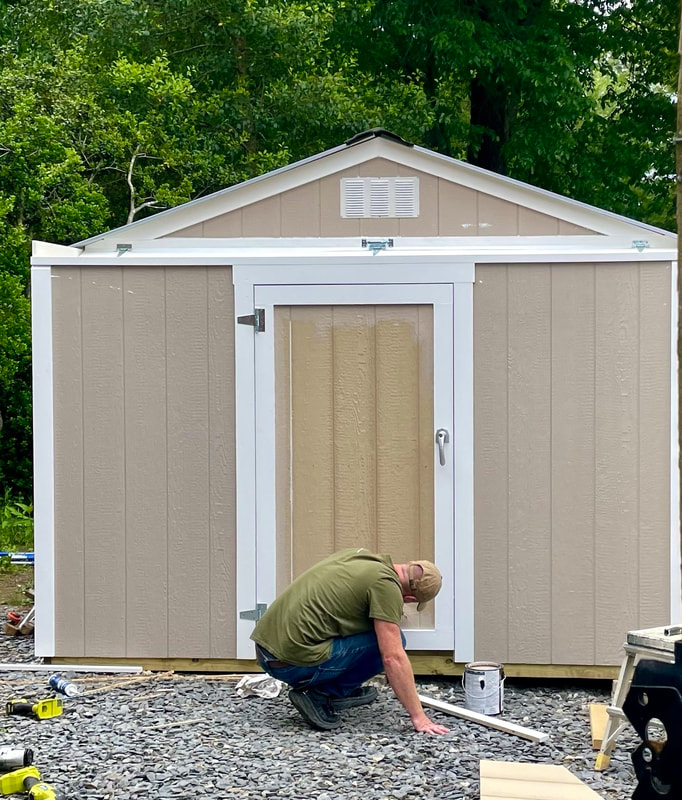 |  |
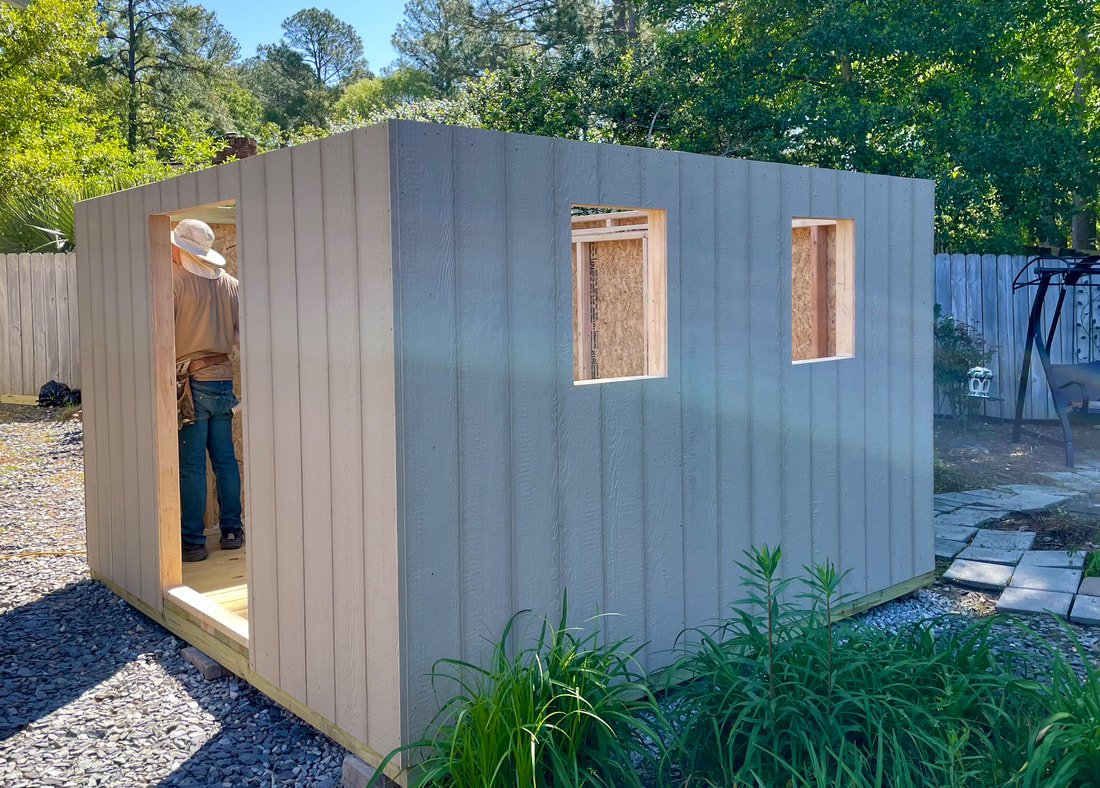
Next the door that had been constructed in the garage was installed. Then all the outside walls were painted to match our garage to complete the project! Austin did a great job!!
 | 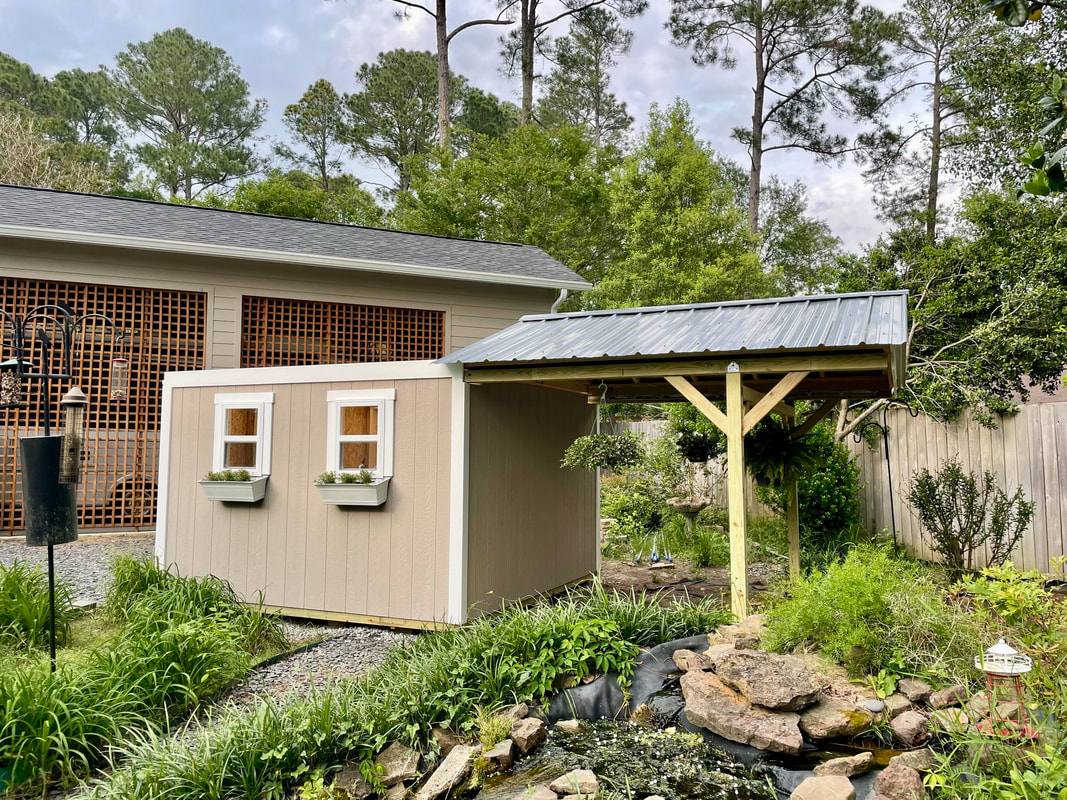 |
This design enables you to roll the roof off and back on by hand. I added some flowers beneath the windows and some hanging plants on the trellis to complete the garden shed effect.
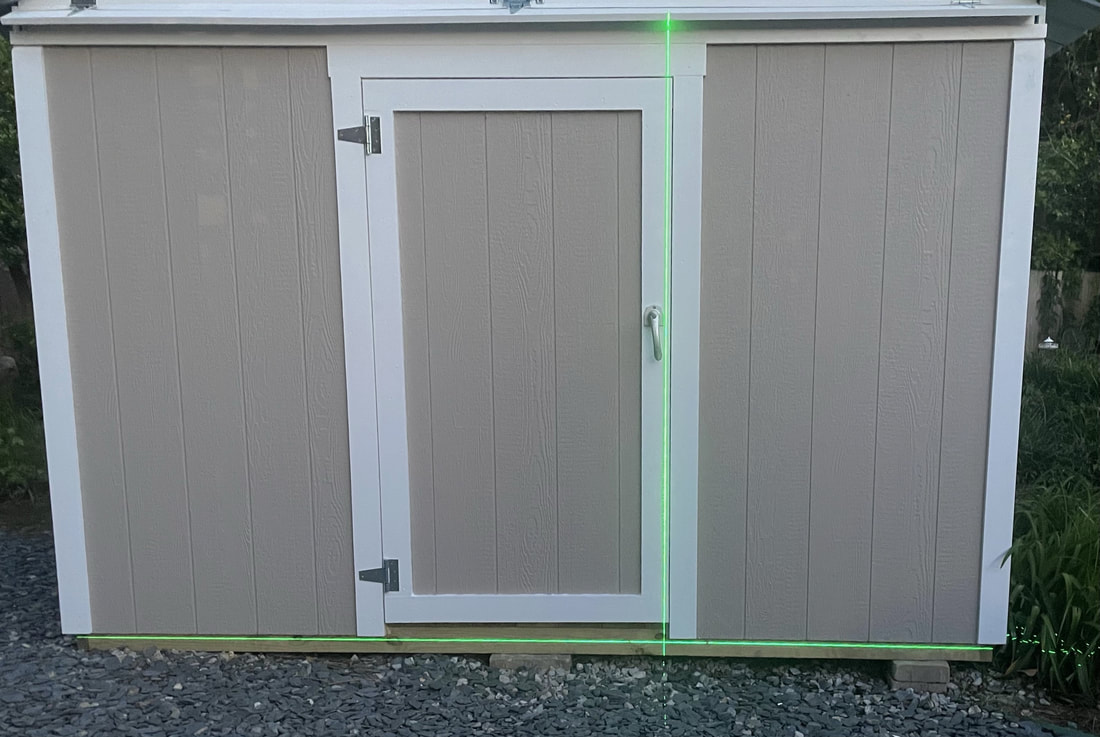 |  |
After a few days I used a laser level to check if any leveling adjustments were needed. (I only had to add two small shims).
The first telescope I used in my new SkyShed was my ED80 on my SkyProdigy mount. When finished for the night, I just rolled the roof back on, turned everything off and went inside the house. It was great!
The first telescope I used in my new SkyShed was my ED80 on my SkyProdigy mount. When finished for the night, I just rolled the roof back on, turned everything off and went inside the house. It was great!
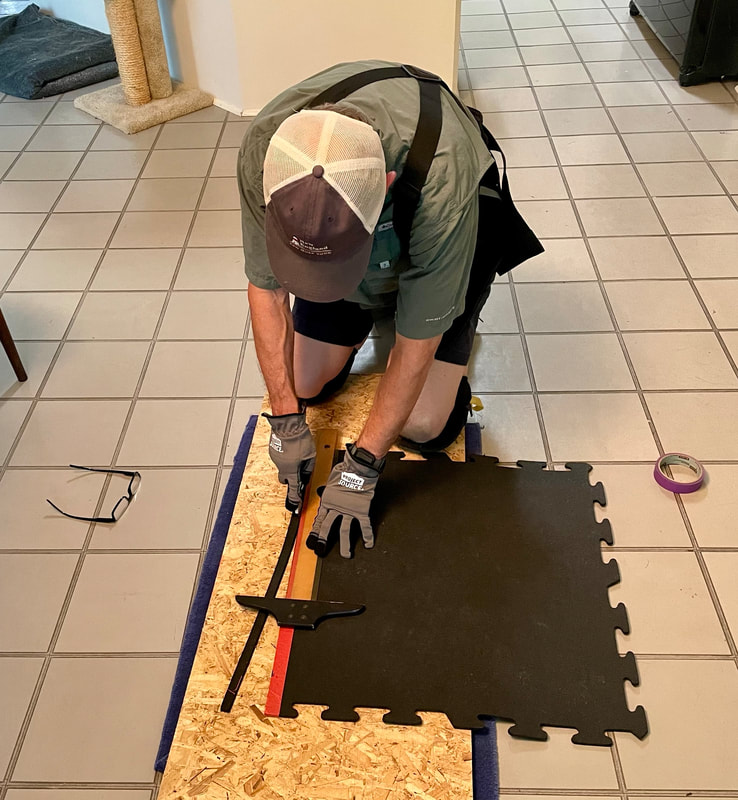 |  |
I decided to use rubber interlocking squares to go over the floor inside the sky shed. I cut a hole for the pier mount and bolted my metal pier back onto the concrete pier below. I refilled the metal pier with sand and bolted its top back on.
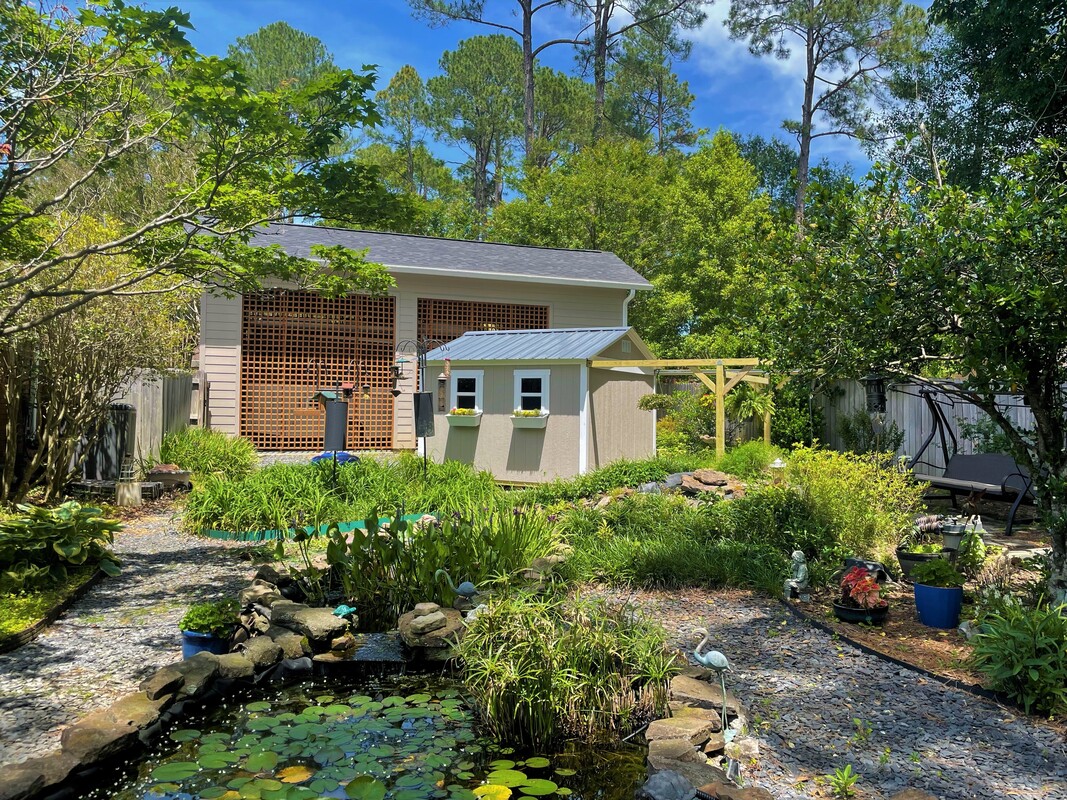 |  |
The completed SkyShed observatory fits in nicely as a backyard garden shed. The picture on the right shows the same setup as the first picture in this post, but now with the pier, mount and telescope in its new cozy home with the roof rolled off for viewing the night skies!
To view my first post click here: "Step 1 - Install a Pier"
For more information about SkySheds click here: SkyShed Observatories
For more information about SkySheds click here: SkyShed Observatories
 RSS Feed