The stacking feature takes each successive image and adds it to the last one and continuously displays the results for a specified number of images. Each image update makes stars brighter and shows more and more detail of nebula and other objects. But there is a catch. This only works well if each image exactly lines up with the last one. If your mount’s tracking is not exact, you will get a smeared image instead. If you have an Alt-azimuth mount it gets worse due to what is called field rotation. This is especially true if the telescope is pointed near vertical.
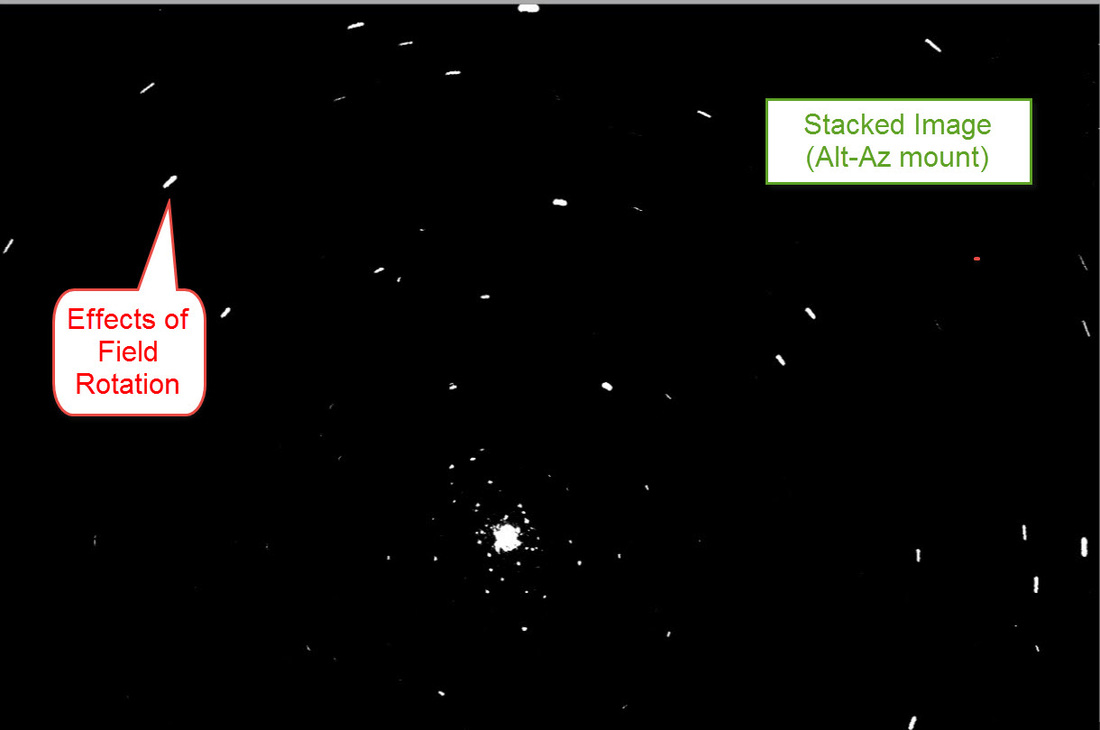
Unlike an equatorial mount which essentially only has to track in one direction to follow the movement of the stars, an Alt-azimuth mount has to track in two directions. Picture in your mind how the telescope on an Alt-azimuth mount would rotate around as the mount tracks objects in the sky. If you just stack images, you would see star trails that are longer the closer the stars are to the edge of your field of view.
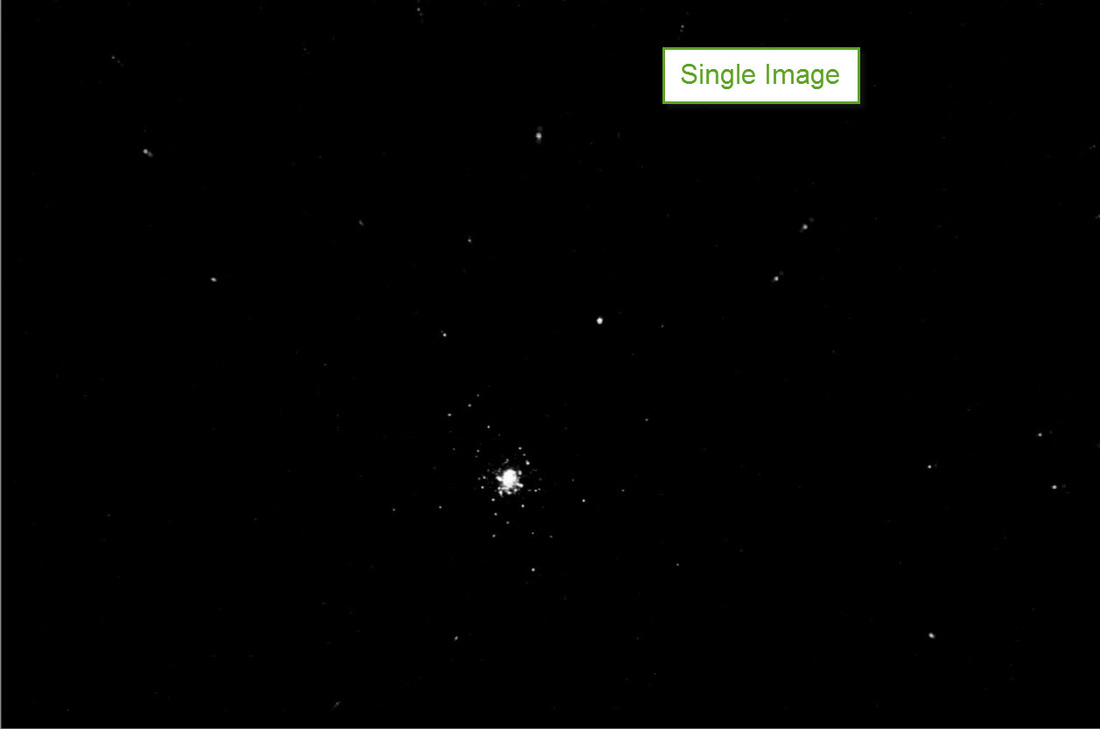
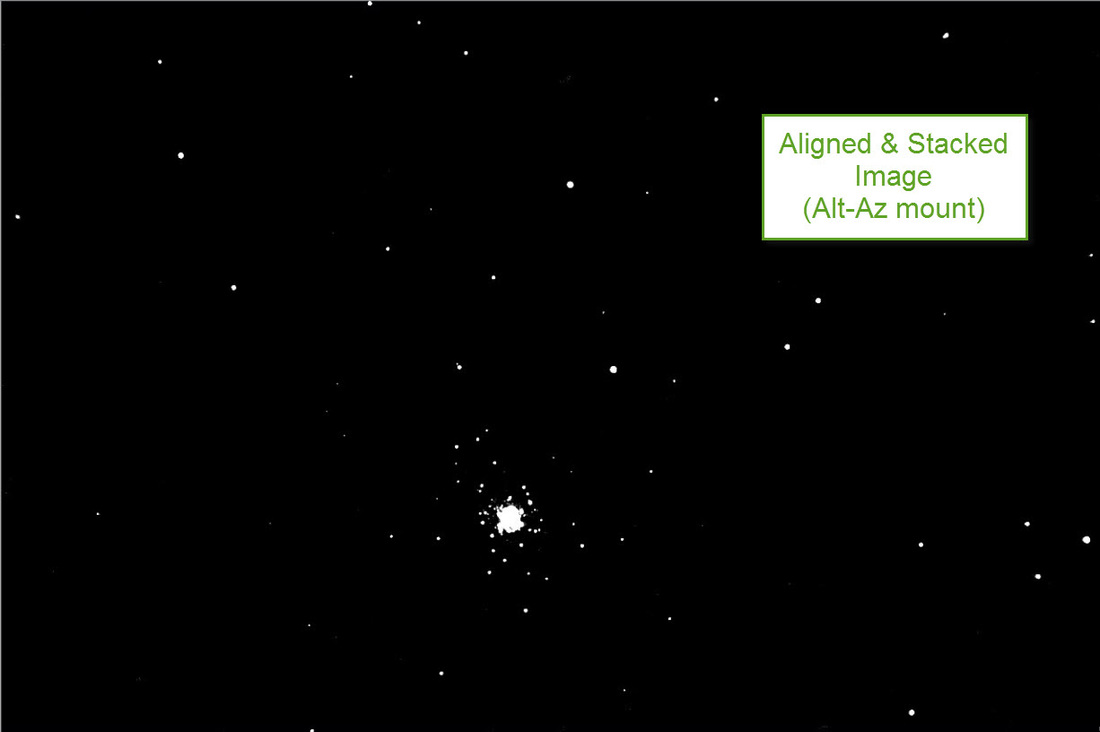
Tracking errors (even on equatorial mounts) and field rotation (on Alt-azimuth mounts) can be virtually eliminated if each image to be stacked is a short exposure so there are little, if any, tracking problems in each image. Each image is then moved and/or rotated slightly so all the stars line up when you stack each image. See the examples below.
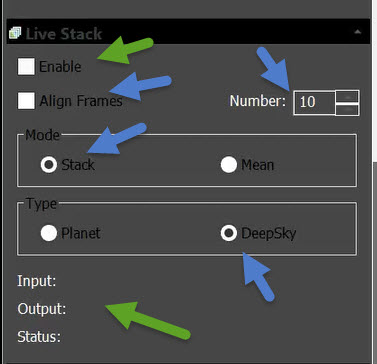
Here is the new Live Stack section in MallinCamSky used to align and stack images in real time.
If you are viewing a planet, select Planet instead of Deep Sky. If you want to average several frames to smooth out noise, select Mean rather than Stack. Instead of adding each image so it gets brighter and brighter, it averages each image and helps reduce background noise. If you have an equatorial mount that tracks very well (particularly when using autoguiding), you can leave align unchecked and it will just stack images without trying to align them.
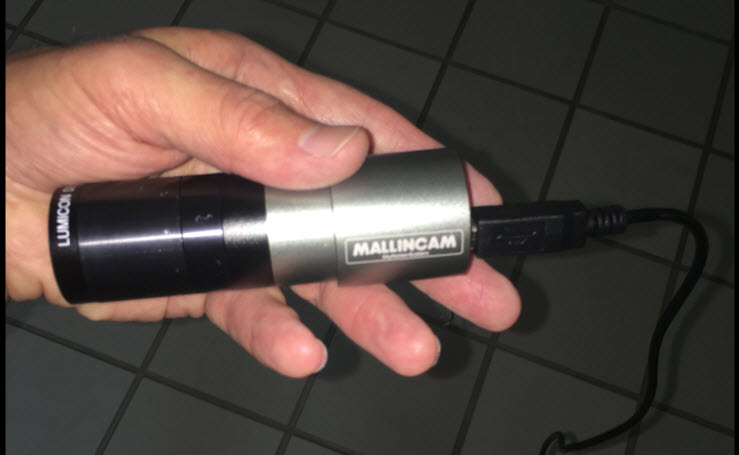
I tested the new Align & Stack feature of MallinCamSky using the SkyRaider entry level AGm and AGc cameras. All SkyRaider cameras use a single USB cable for power, control and image transfer. Here is my SkyRaider AGc camera with a MFR5 focal reducer attached and a Lumicon Deep Sky filter.
The key to getting the Align & Stack to work well is to make sure you have several background stars visible around your target before enabling Live Stack. If you image does not contain enough stars the software cannot line up the images before stacking them. When you click on Enable you will notice a pause after the first frame as it analyzes the stars in the image. If you see OK appear next to Status, it will begin the align and stack process. If not, you probably should uncheck Enable and see if you can adjust your image to bring out more stars by increasing the gain and/or exposure. It is also important to adjust the histogram around the visible spectrum of your target. I reduced the upper histogram range to 100 or less in my tests. Depending upon conditions, your target area and the size of your telescope, you may not be able see enough stars to use the Live Stack feature on some deep sky objects. Due to my recent conditions and the position of M51 in the sky, I could not use Align and Stack on the whirlpool galaxy with my 5” scope and Alt-azimuth mount. Maybe another time when it is cooler and less humid I will have more luck. I was able to Align and Stack using M51 using my 8” scope on an equatorial mount.
Here are a series of video clips of my testing that show how to use the Align and Stack feature. In some of the clips you will also see the use of the MallinCamSky live dark field correction feature that virtually eliminates hot pixels and amp glow from your image. (See my blog “MallinCamSky Real Time Histogram and Dark Field Correction Functions” on 03/17/2016 to learn more about dark field correction.)
Equatorial Tests
For these tests I used using my SkyRaider AGc camera with MFR5 reducer on my Celestron C8 and CG-5 equatorial mount. Temperature was 76 degrees with 75% humidity and dew point of 66 degrees.
At the start of the next three videos you will also see how before I begin, I first capture dark frames to eliminate hot pixels using the same settings as I plan to use to view the target.
First Video
M13 as target object with 15s exposure, gain of 3, histogram 0-100 and stacking set to 5 frames:
https://youtu.be/KoTyxXmCyFk
Second Video
I tried these same setting to align and stack m51, but there were not enough stars visible with a gain of 3 for aligning the images. I then bumped the gain up to 10 and was able to see enough stars to both align and stack the images.
M51 as target object with 15s exposure, gain of 10, histogram 0-50 and stacking set to 10 frames:
https://youtu.be/q7jF4DjzFzQ
Third Video
I reduced the exposure to 5 seconds and used m92 for my next target.
M92 as target object with 5s exposure, gain of 10, histogram 0-50 and stacking set to 10 frames:
https://youtu.be/paA3yKc-mfQ
Alt-azimuth Tests
The next night I used my SkyProdigy Alt-azimuth mount. As I previously noted, the image align feature is key to handling the problem of field rotation encountered with Alt-azimuth mounts when stacking images.
I used my Celestron 5" telescope along with the SkyRaider AGc camera with the MFR5 focal reducer attached. It was 78 degrees with 80% humidity and 71 degree dew point. Seeing conditions were not as good as the previous night.
I successfully tested this setup using two of the same targets I used the night before - m13 and m92. I did try to test with m51 as well like the previous night, but it was too low on the horizon to "see" enough nearby stars for the align feature to be used.
First Video
M13 at 5 second exposure, gain 10, histogram 2-20, align and stack 10 frames. I also compared it to stacking without align to show the benefits of MallinCamSky real time align and stack when using an Alt-azimuth mount.
https://youtu.be/rr3czdwG-vQ
Second Video
M92 at 5 second exposure, gain 10, histogram 2-20, align and stack 10 frames:
https://youtu.be/xkL4T1G5XzA
Third Video
M92 stack (no align) using 5 sec exposure to illustrate importance of real time align function when using an Alt-azimuth mount:
https://youtu.be/qBEv7jgtbjQ
Fourth Video
The next night there was also humidity and it was not the best seeing conditions. Even so, I was able to "see" the Ring Nebula using the align and stack feature as shown in this video.
https://youtu.be/N3DuK0ES4z4
Summary
As long as there are enough nearby stars "visible" near your target before stacking, the new align and stack feature of MallinCamSky extends the ability of your telescope and mount to see more detail using a longer effective exposure time while virtually eliminating tracking errors and field rotation issues.
 RSS Feed