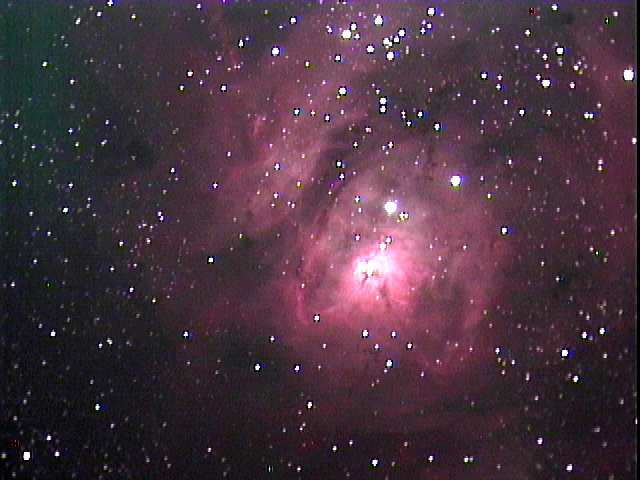
Some Deep Sky Objects have a wide range of detail, but present a challenge. For example, you can see the Trapezium stars in the core of the Orion Nebula if you use a short exposure. To see the fine edge detail you need to use longer exposures, but that “blows out” the core and you can no longer distinguish the Trapezium. This can be overcome using a High Dynamic Range technique by capturing several images of varying exposure and post process them later to combine them and produce a final image with a good range of detail. It would be nice to see this in real time though.
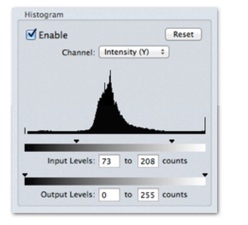
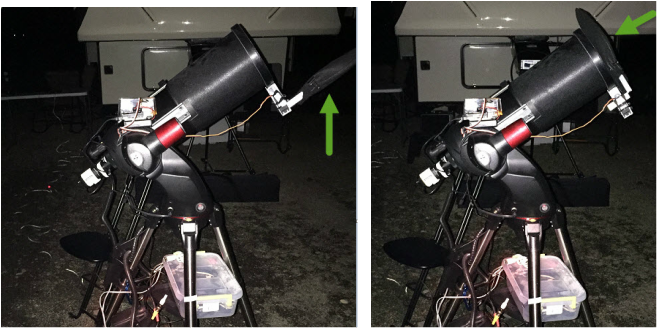
I tried something interesting last night that is somewhat like a Live High Dynamic Range (LHDR) averaging technique. I was using my Celestron 8” with Hyperstar with the DS10c aimed at the Orion Nebula. The 3/4 moon was rising so I was also using a Baader Planetarium Moon and Skyglow filter. The key settings I used that remained constant were: 1 second exposure (video mode), histogram 65-255 and sharpen at 100. I did not use binning. I started with gain at 4 and turned on planet averaging with align. After it output 12 frames I moved the gain slider up to 40 and let it continue averaging. After it averaged 12 more frames I moved the gain slider up to 80 and let it continue. Looking at the screen after it averaged 12 more frames I decided to let it just continue averaging at gain 80. After it had averaged 19 more frames I captured the final averaged image. I took snap images each time I changed the gain so I could show how the image “developed”. No post processing was done on any of these images of M42.
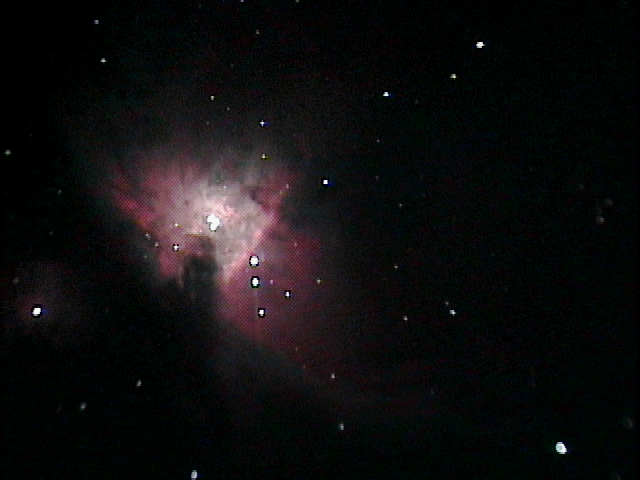
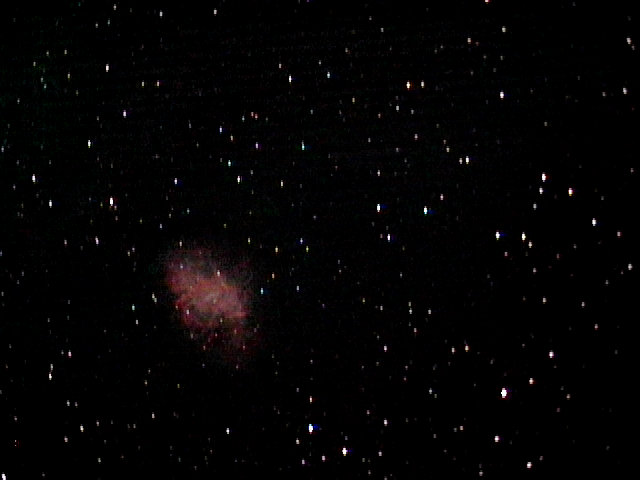
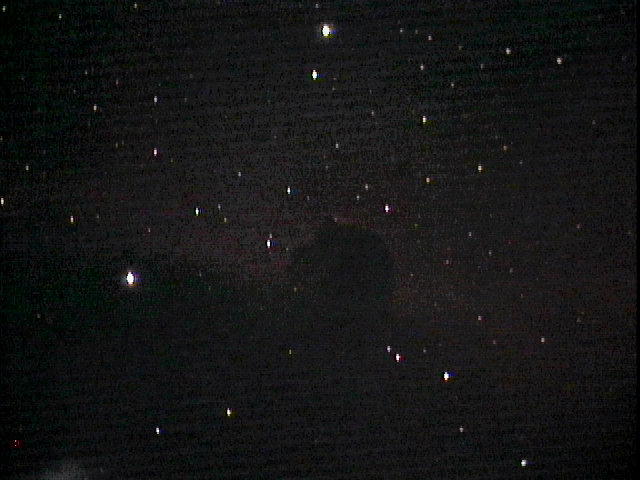
Gain of 4, 1 second, histogram 65-255, 12 averaged frames using live stacking.
I tried something interesting last night that is somewhat like a Live High Dynamic Range (LHDR) averaging technique. I was using my Celestron 8” with Hyperstar with the DS10c aimed at the Orion Nebula. The 3/4 moon was rising so I was also using a Baader Planetarium Moon and Skyglow filter. The key settings I used that remained constant were: 1 second exposure (video mode), histogram 65-255 and sharpen at 100. I did not use binning. I started with gain at 4 and turned on planet averaging with align. After it output 12 frames I moved the gain slider up to 40 and let it continue averaging. After it averaged 12 more frames I moved the gain slider up to 80 and let it continue. Looking at the screen after it averaged 12 more frames I decided to let it just continue averaging at gain 80. After it had averaged 19 more frames I captured the final averaged image. I took snap images each time I changed the gain so I could show how the image “developed”. No post processing was done on any of these images of M42.
Gain of 4, 1 second, histogram 65-255, 12 averaged frames using live stacking.

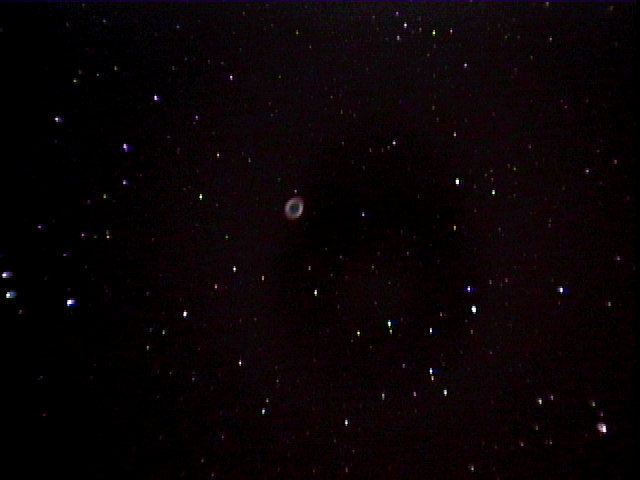
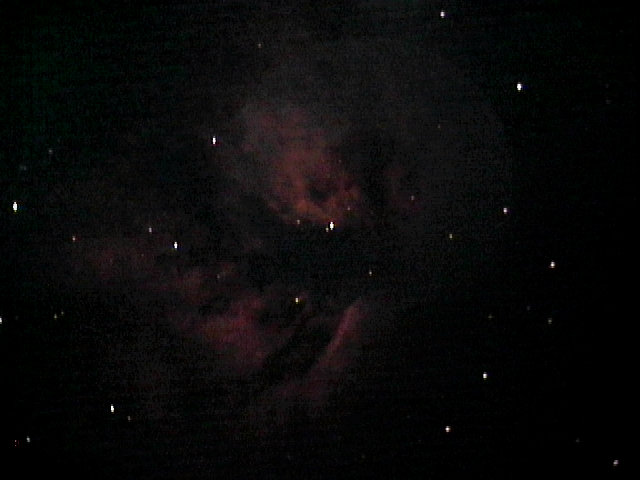
Gain of 4, 1 second, histogram 65-255, 12 averaged frames plus 12 averaged frames at gain of 40 using live stacking.

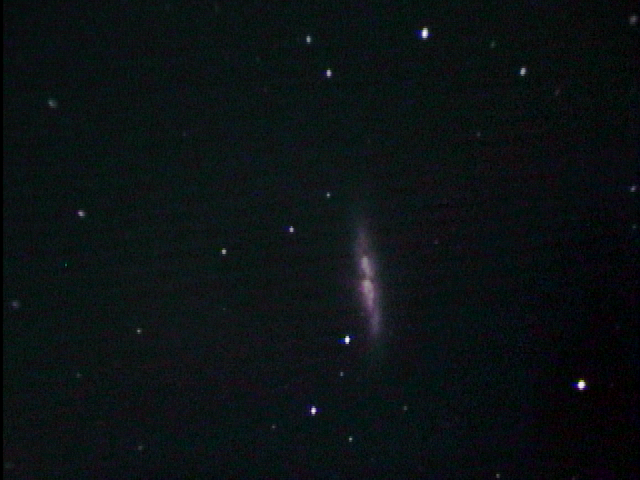
Gain of 4, 1 second, histogram 65-255, 12 averaged frames plus 12 averaged frames at gain of 40, plus 12 averaged frames at gain of 80 using live stacking

Gain of 4, 1 second, histogram 65-255, 12 averaged frames plus 12 averaged frames at gain of 40, plus 12 averaged frames at gain of 80, plus 19 additional frames at gain of 80 using live stacking

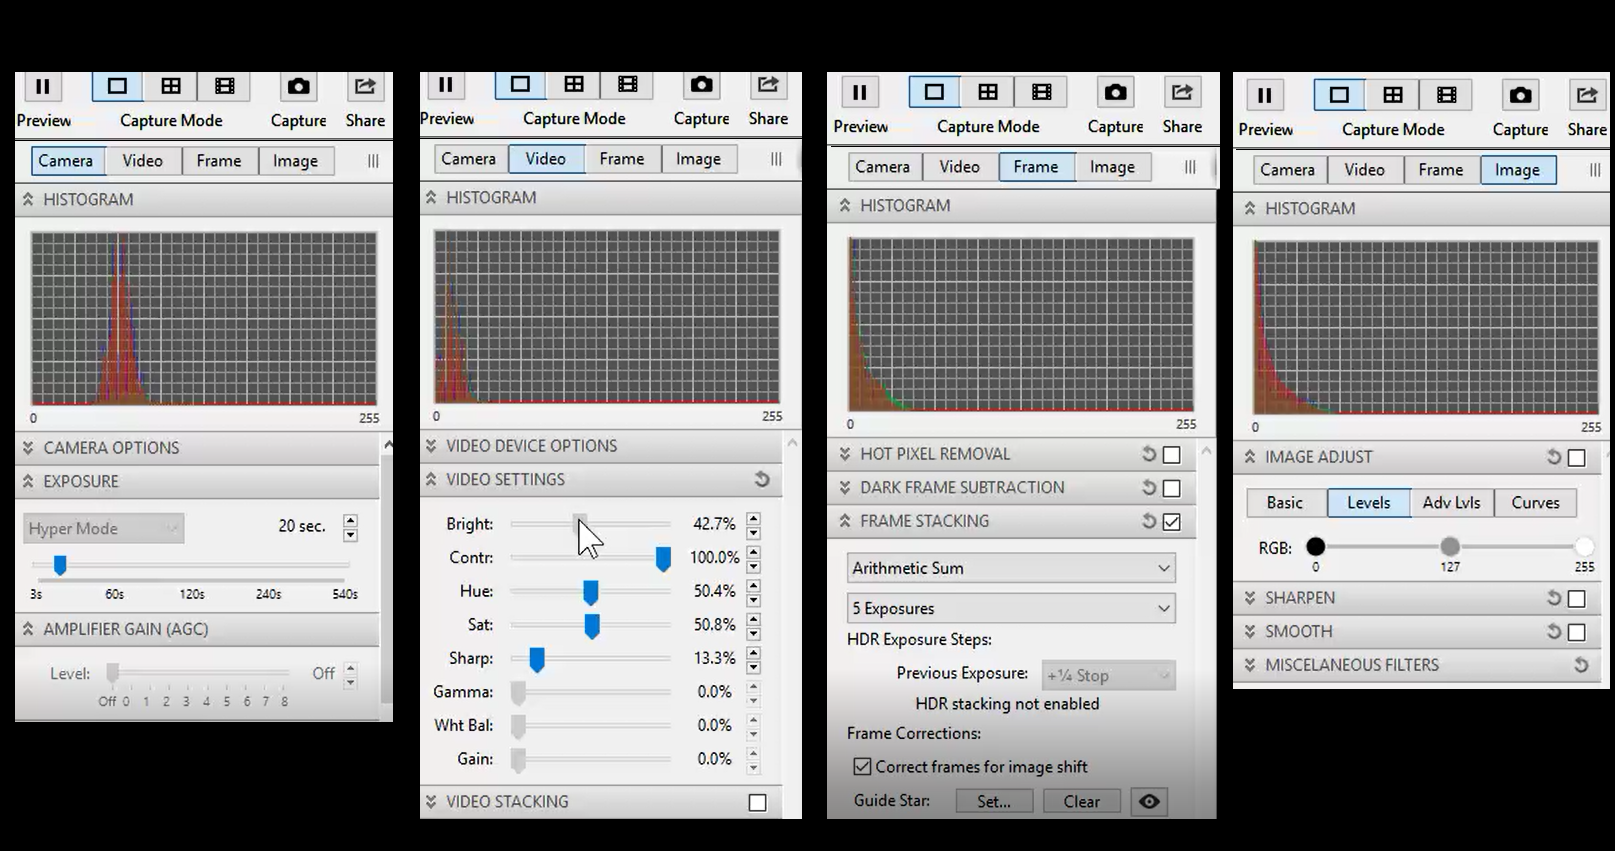
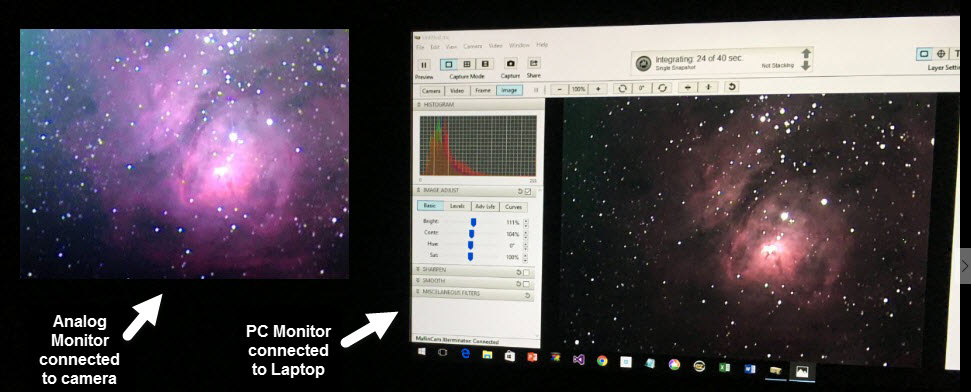
Here is a screen shot of the MallinCamSky screen when it had output a total of 55 frames
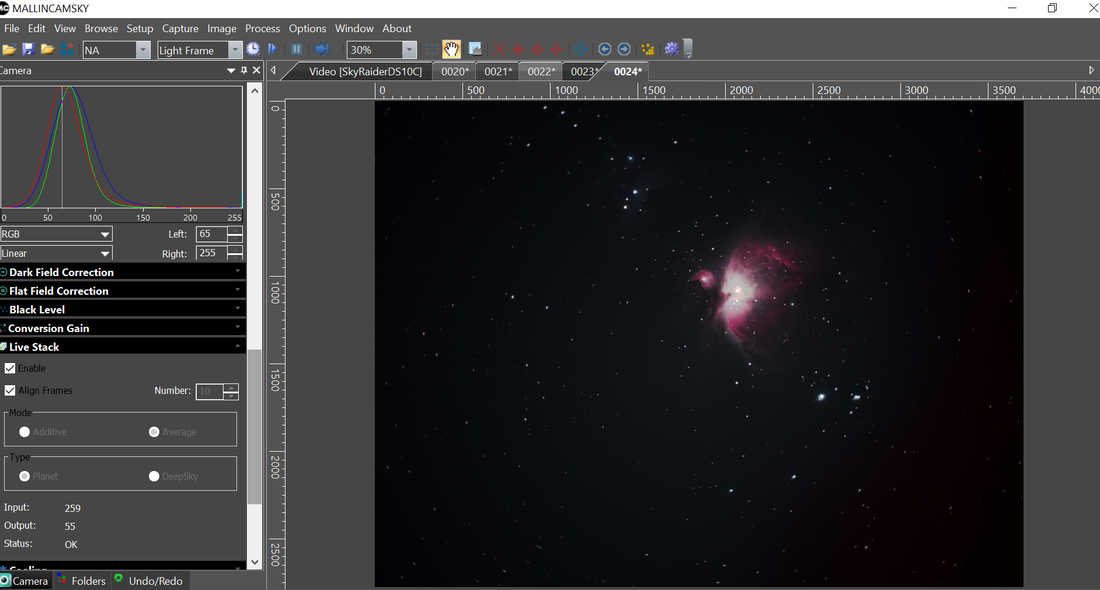
Note: you can change the gain or exposure while averaging when using video mode with the DS10c. You cannot dynamically change the gain or exposure when trigger mode is on and looping. You can only go up to 5 second exposure in video mode, but I usually use less than 5 second exposures due to my setup and the sensitivity of the DS10c.
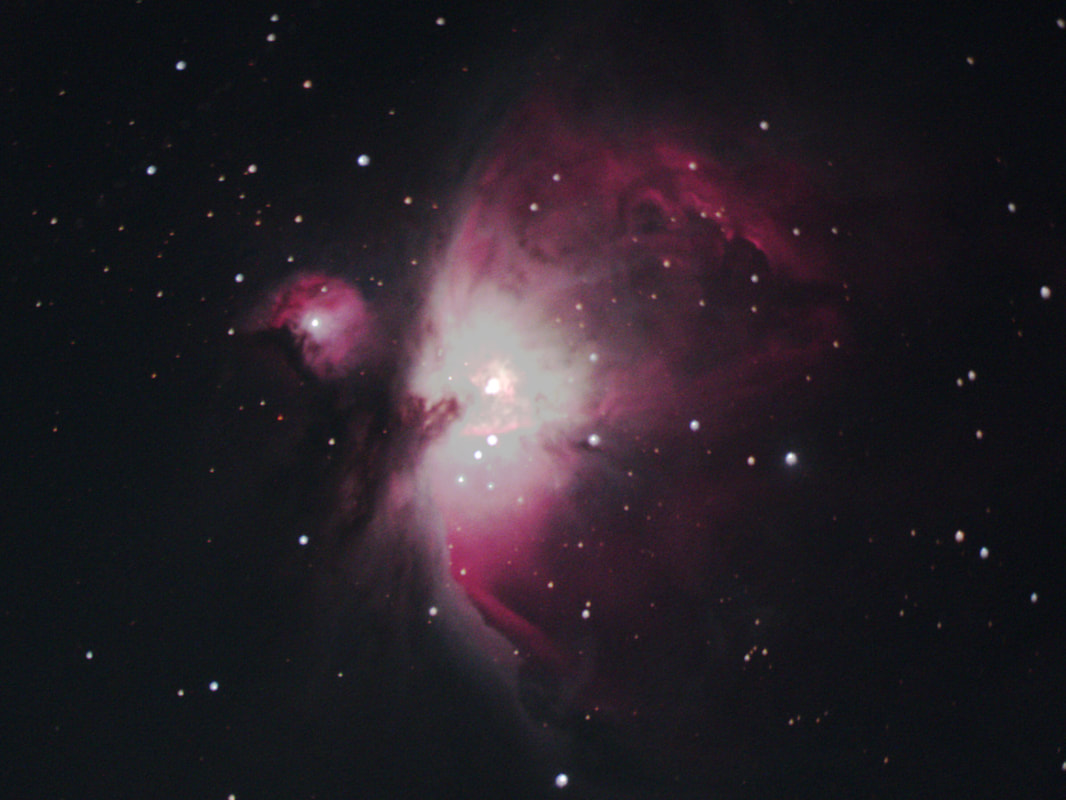
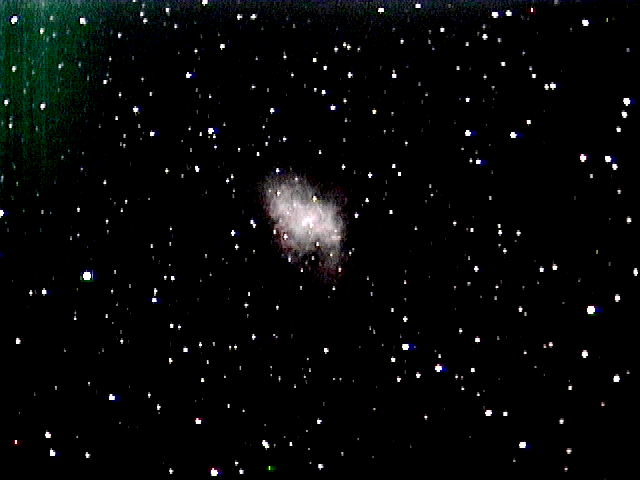
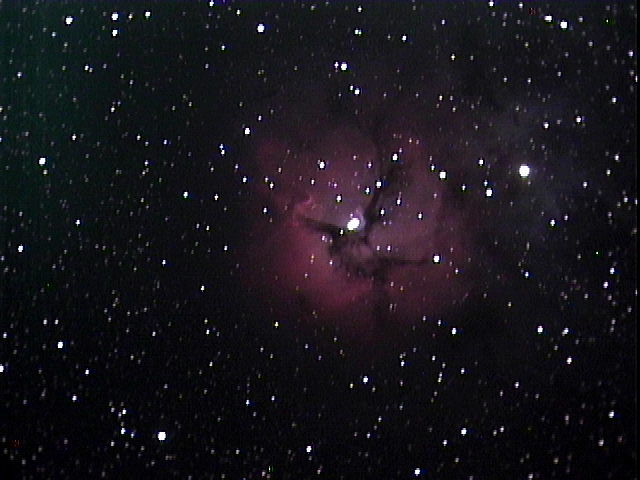
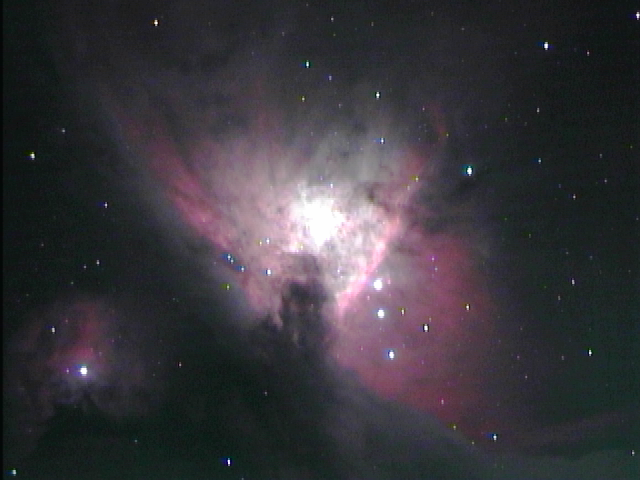
The following image on the left is a cropped version of the final frame using this LHDR technique. This LHDR image shows the stars in the core of the Orion Nebula and nice detail of the surrounding area.
The following image on the left is a cropped version of the final frame using this LHDR technique. This LHDR image shows the stars in the core of the Orion Nebula and nice detail of the surrounding area.
 | 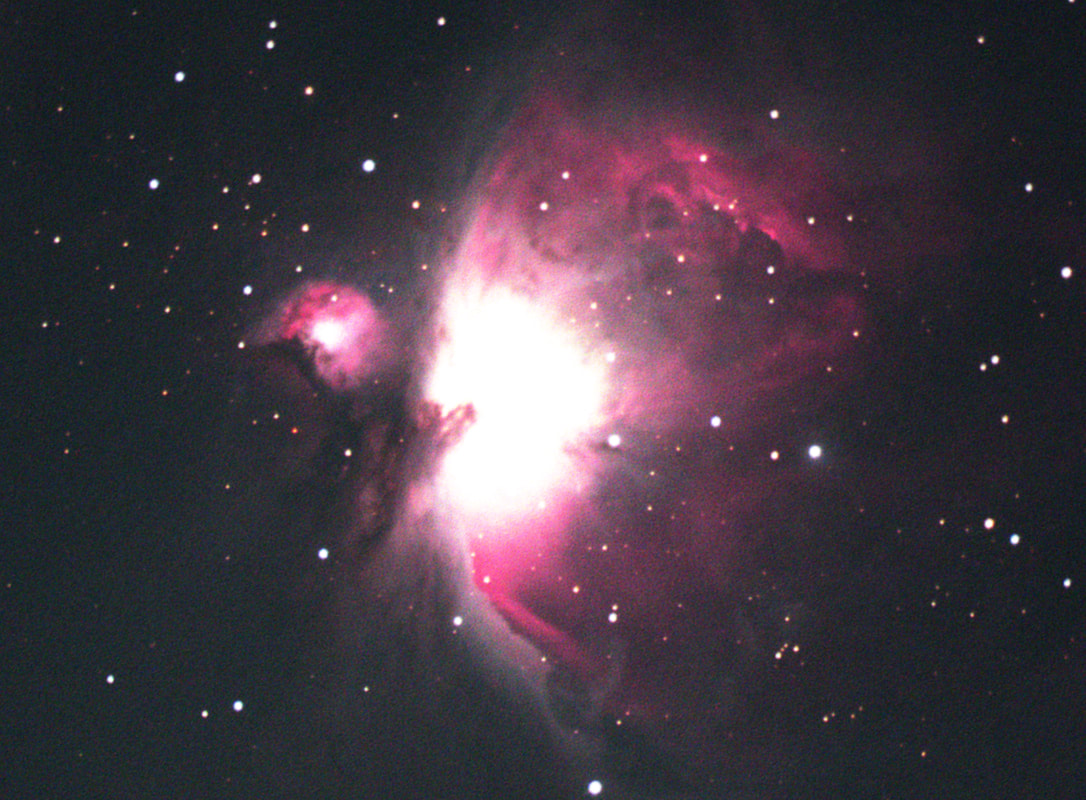 |
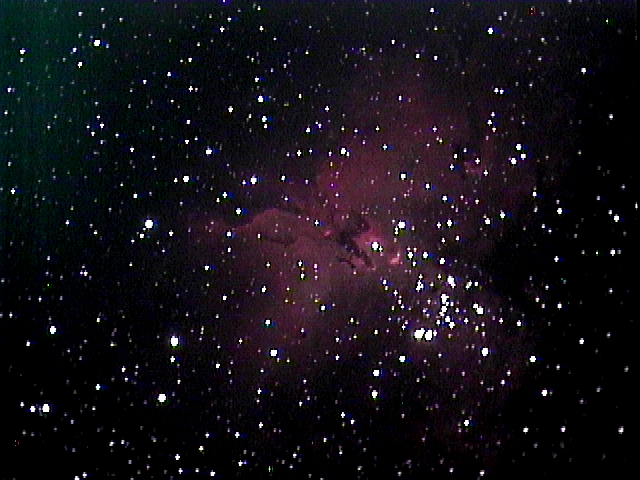
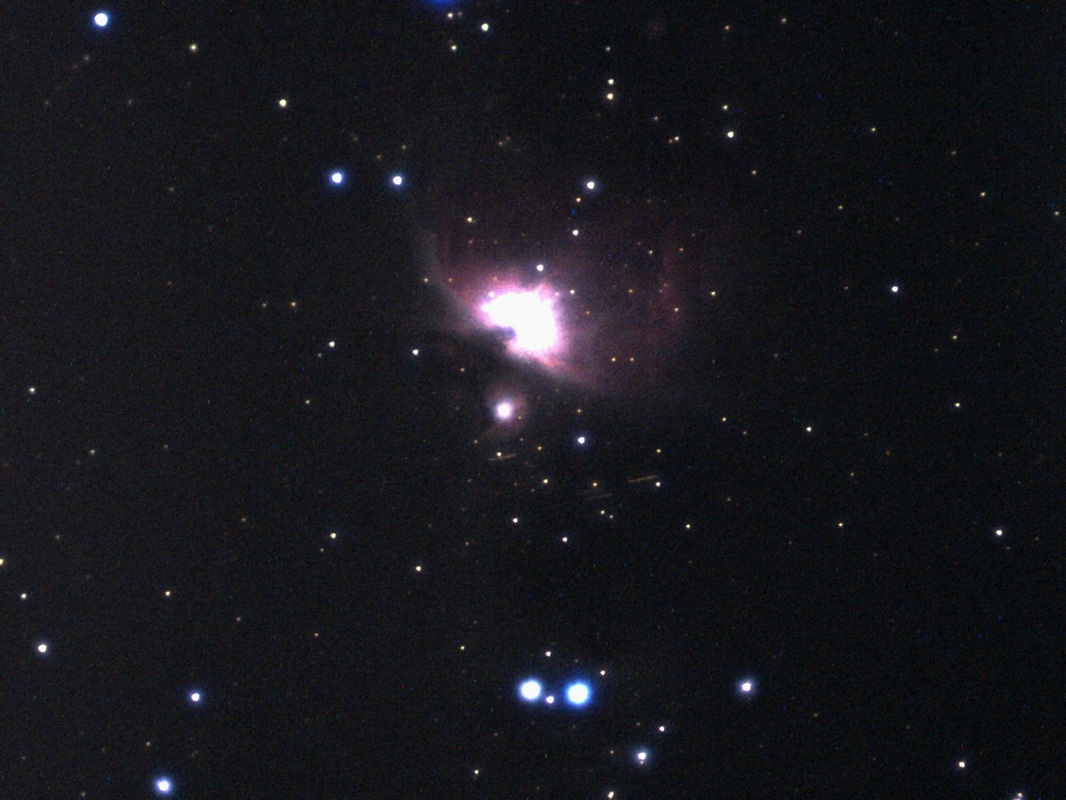
On the right is a cropped version of an image capture using gain of 4, 1 second, histogram 65-255, and frame averaging without using this LHDR technique. You can see the outer fine detail, but the core is overexposed and you cannot distinguish the Trapezium like you can in the LHDR image on the left.
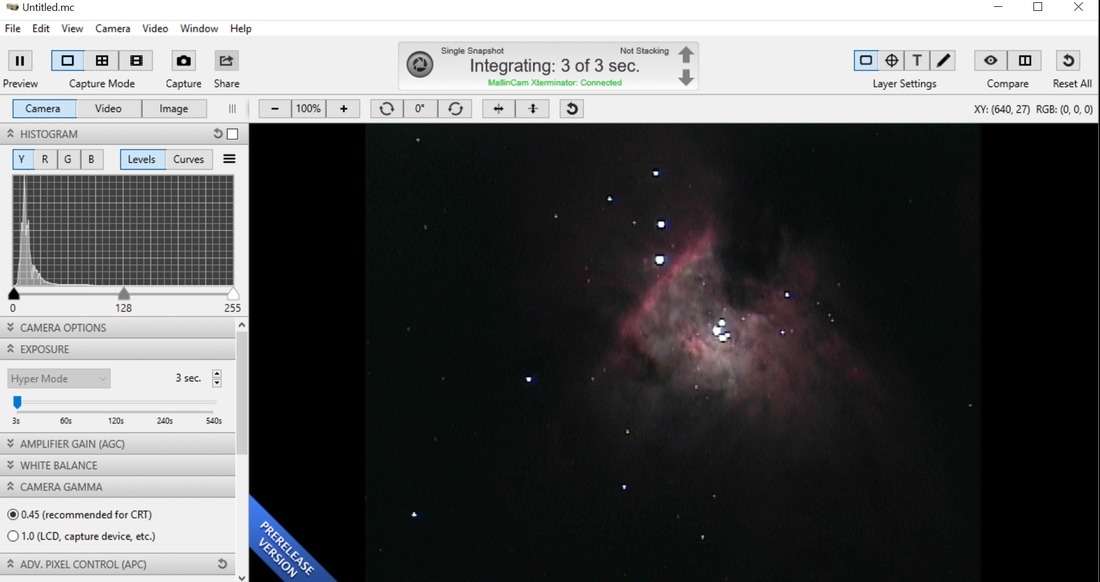
The Miloslick software for the Xtreme/Xterminator cameras has a HDR mode for objects like the Orion Nebula that can automatically vary the exposure time over several frames combining them in real time to produce a nice detail in the image viewed on the screen. I could have varied the exposure time instead of the gain during average stacking in video mode in the MallinCamSky application, but chose to vary the gain because I could get a much wider dynamic range in a short period of time by just varying the gain of the DS10c and leaving the exposure time at 1 second. I had to make the changes by hand during averaging with MallnCamSky, but it worked!
The Miloslick software for the Xtreme/Xterminator cameras has a HDR mode for objects like the Orion Nebula that can automatically vary the exposure time over several frames combining them in real time to produce a nice detail in the image viewed on the screen. I could have varied the exposure time instead of the gain during average stacking in video mode in the MallinCamSky application, but chose to vary the gain because I could get a much wider dynamic range in a short period of time by just varying the gain of the DS10c and leaving the exposure time at 1 second. I had to make the changes by hand during averaging with MallnCamSky, but it worked!


 RSS Feed