Last night I tried out my new DS8300cTEC video astronomy camera on my Celestron 6” telescope with Starizona Hyperstar at f/2. I have seen some great images by others using the DS8300cTEC on a Celestron RASA8 telescope using post processing that show what this camera can do on the high end of the scale. I plan to use my DS8300cTEC on the other end of the scale on a portable setup for near real time viewing and outreach. For this, you need the ability to “show something quickly to talk about” and to be able to see several Deep Sky Objects in one viewing that is much more impressive than looking through an eyepiece on a telescope.
The C6 with Hyperstar is a promising portable combination that I have used with my DS10cTEC. I used my AVX mount on my pier in my SkyShed for my DS8300c first light testing on the same C6 with Hyperstar. For portability, I would use this on my Evolution mount.
The C6 with Hyperstar is a promising portable combination that I have used with my DS10cTEC. I used my AVX mount on my pier in my SkyShed for my DS8300c first light testing on the same C6 with Hyperstar. For portability, I would use this on my Evolution mount.
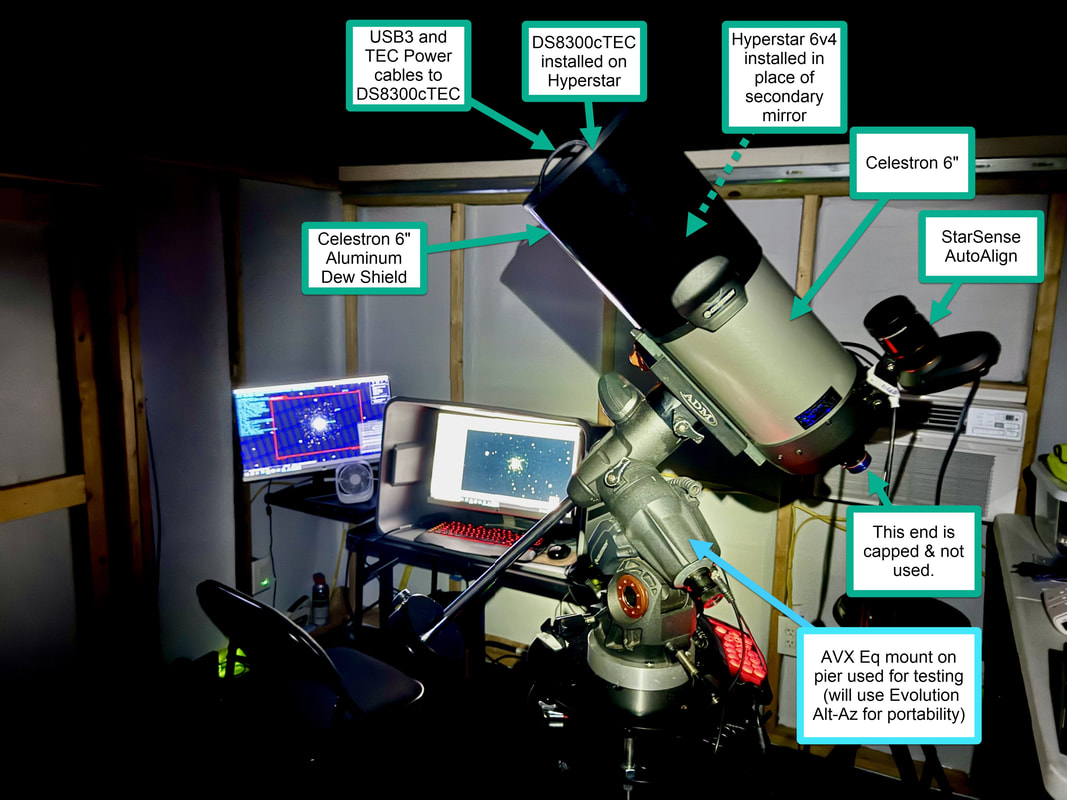
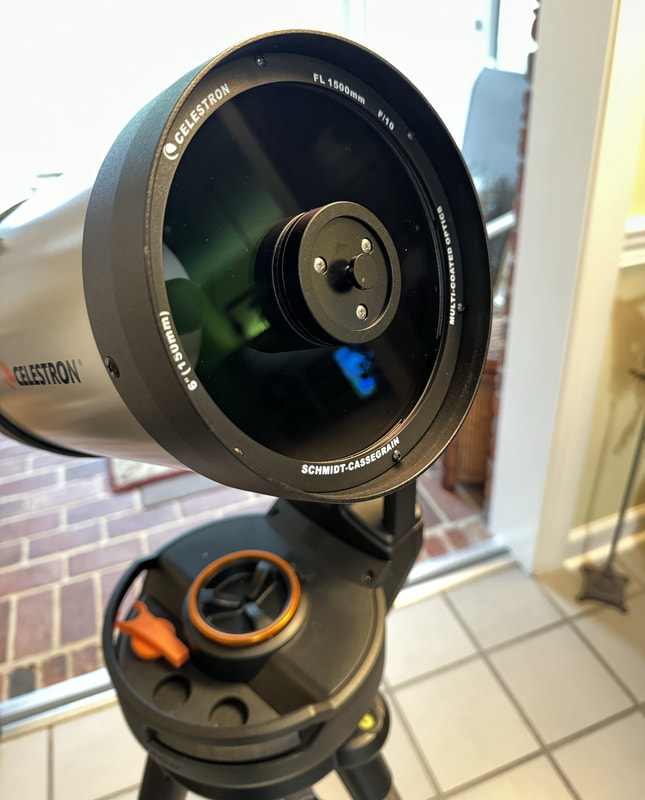
In the above picture the Hyperstar is hidden by the Dew Shield. The following picture shows the C6 before and after the Hyperstar is installed replacing the secondary mirror. The DS8300c (or DS10c) easily screws onto the Hyperstar. This also shows the C6 on my portable Evolution mount.
 |  |
The DS10c had a very large field of view due to its fairly large sensor size, especially when used with Hyperstar. This requires notable zooming (or using ROI) for many typical outreach targets. I found the DS8300cTEC seems to work well visually to see objects reasonably well without zooming, and works well when zoomed in due to its small pixel size. The DS10c has 4.63 micron pixels and the DS8300 has 2.9 micron pixels. The DS10c is a 10.7MP camera while the DS8300c is an 8.3MP camera, which seems to make the stacking a little quicker with the DS8300c since less data is being transferred and the FOV is smaller on the DS8300c.
Below are some images from last night that confirmed for me that the DS8300cTEC should accomplish my objective. The small crescent moon was up at twilight when I captured my first image, which gives a good idea of the FOV with this setup. I was only able to do a quick focus just before the moon set below my rooftop. Before moving onto other targets, I performed a better focus using Vega and a focus mask. The following images include the exposure time in seconds, gain, histogram settings and number of stacked images. All images use bin 1 and a CLS filter.
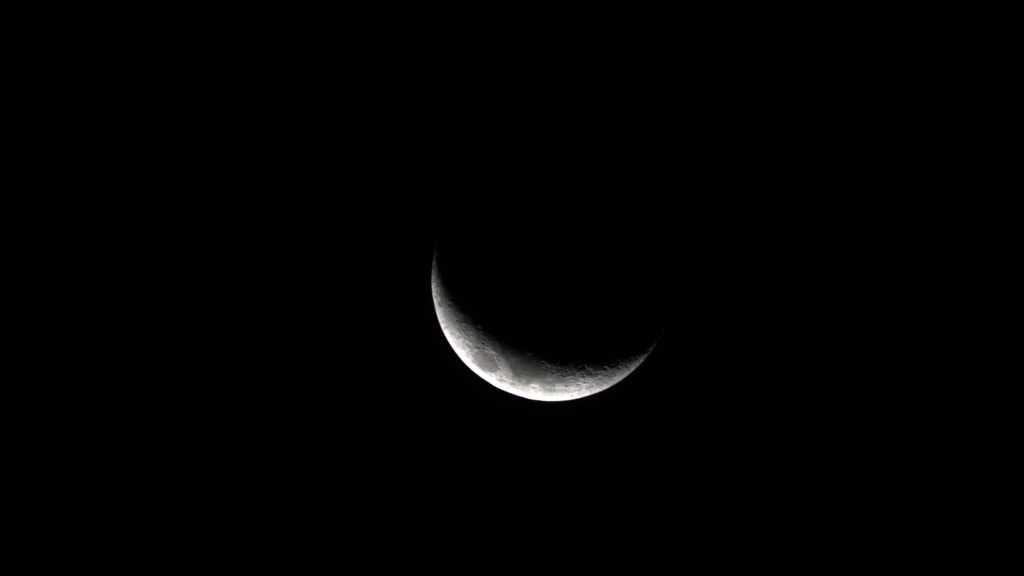
Moon 1.6ms 1g 0-255h no-stacking CLS filter 8.25pm-twilight
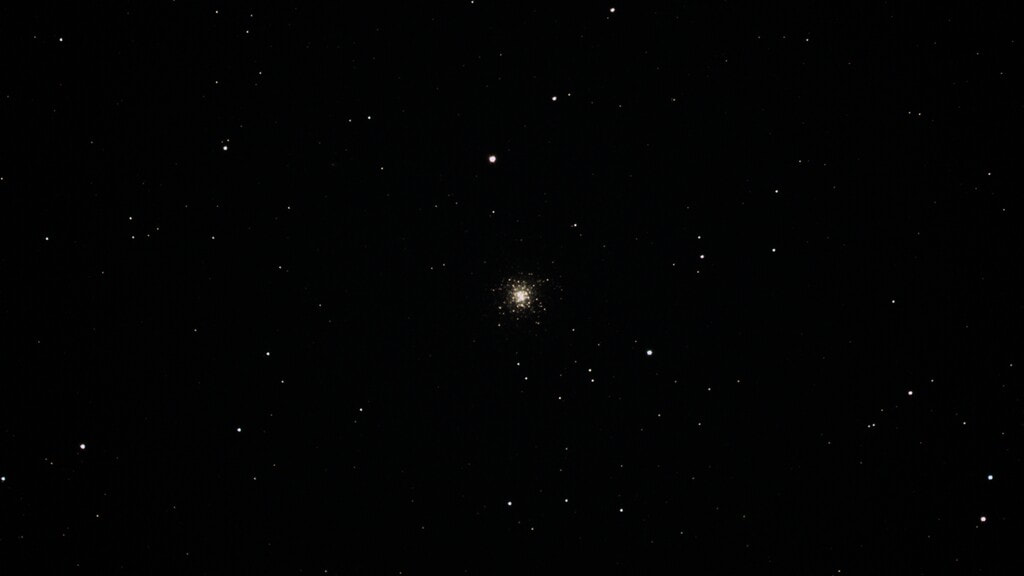
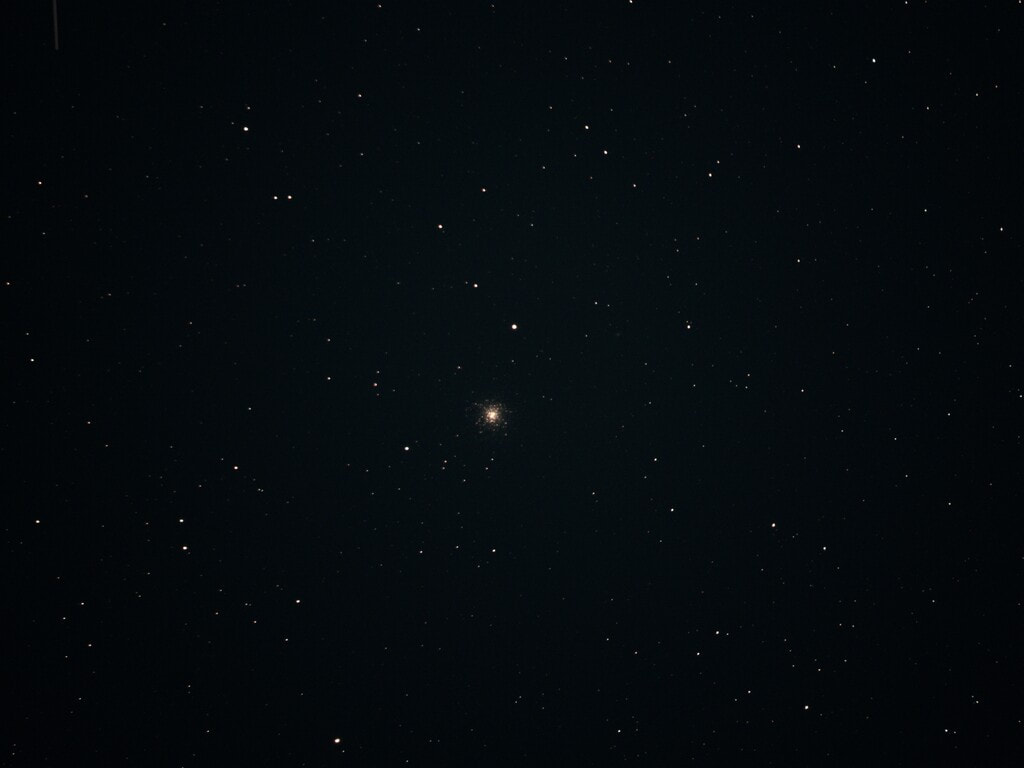
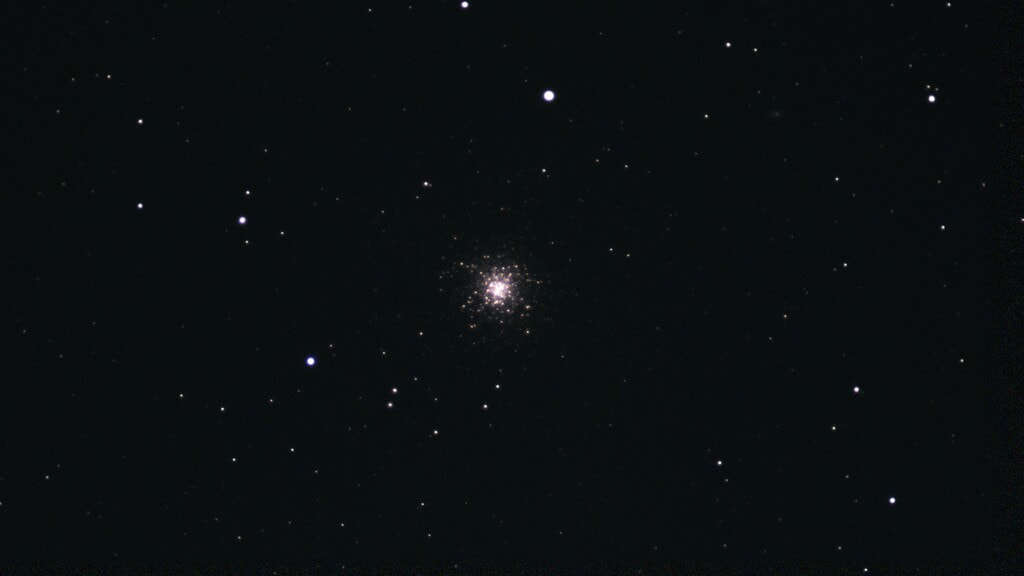
M13 Hercules Cluster 1.1s 75g 0-255h 20stk CLS filter
DS10c: M13 Hercules Cluster 1.1s 160 16-255h 15stk CLS filter. This is a prior night's image using DS10c with same setup for comparison purposes. The field of view is much larger than the DS8300.
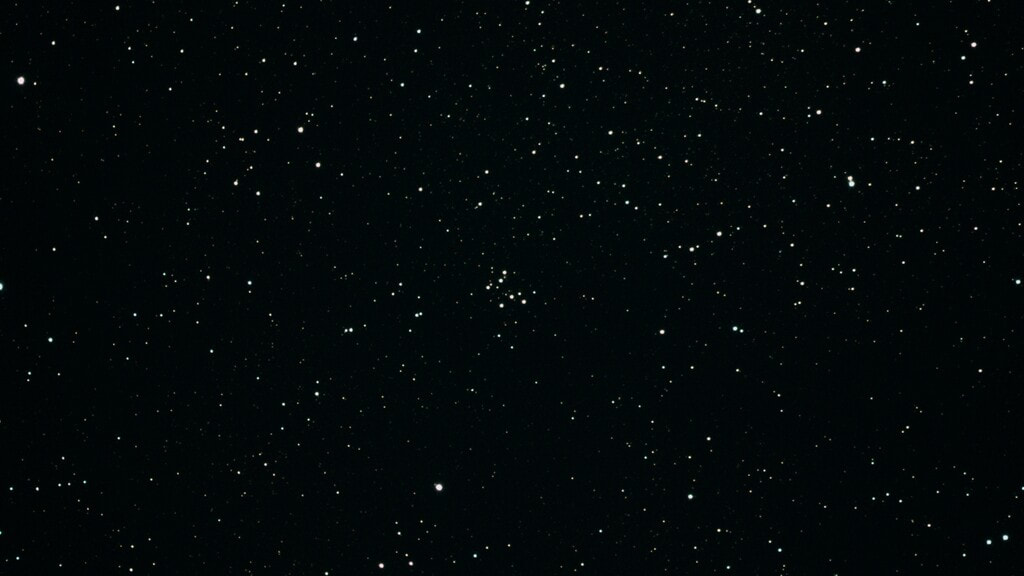
M29 Cooling Tower 1s 130g 0-255h 10stk CLS filter
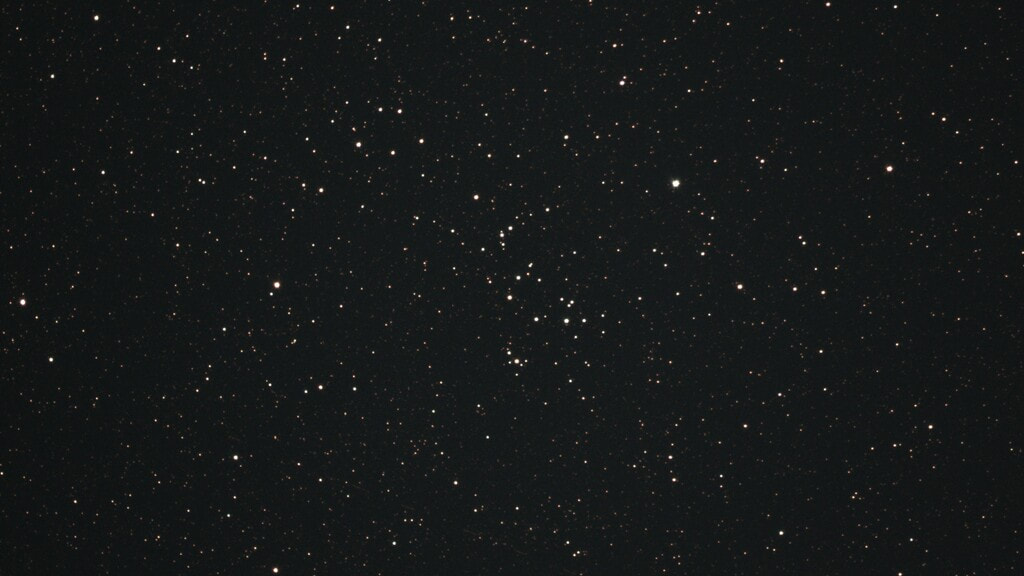
ngc6633 Captain Hook Cluster 1.3s 65g 10-255h 10stk CLS filter
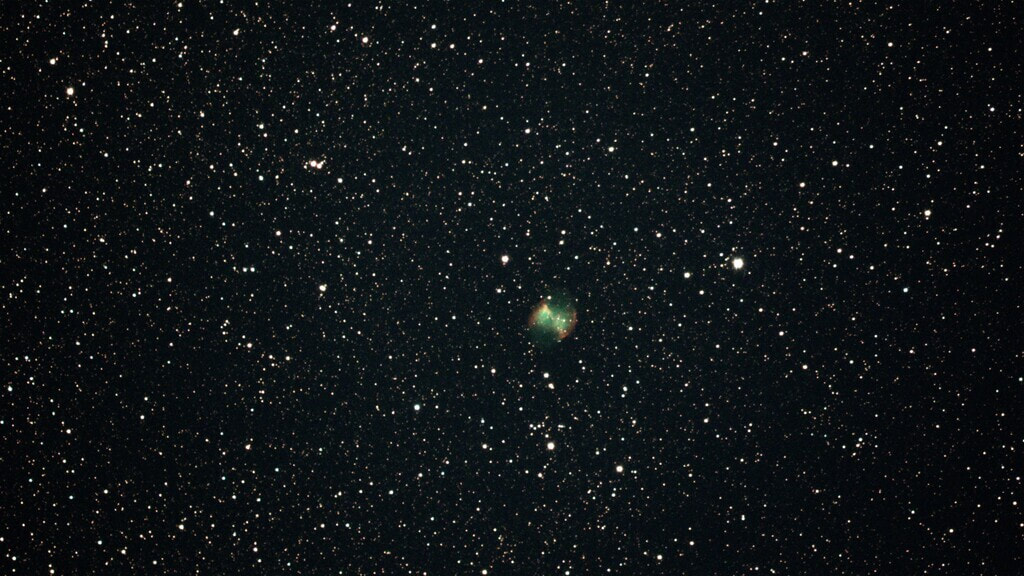
As an example to “show something quickly to talk about”, the Dumbbell immediately appeared on the screen when the slew stopped. This image was captured in less than a minute using 1.1 second exposures, 75 gain and 20 stacked images. It is followed by a zoomed image that shows more detail.
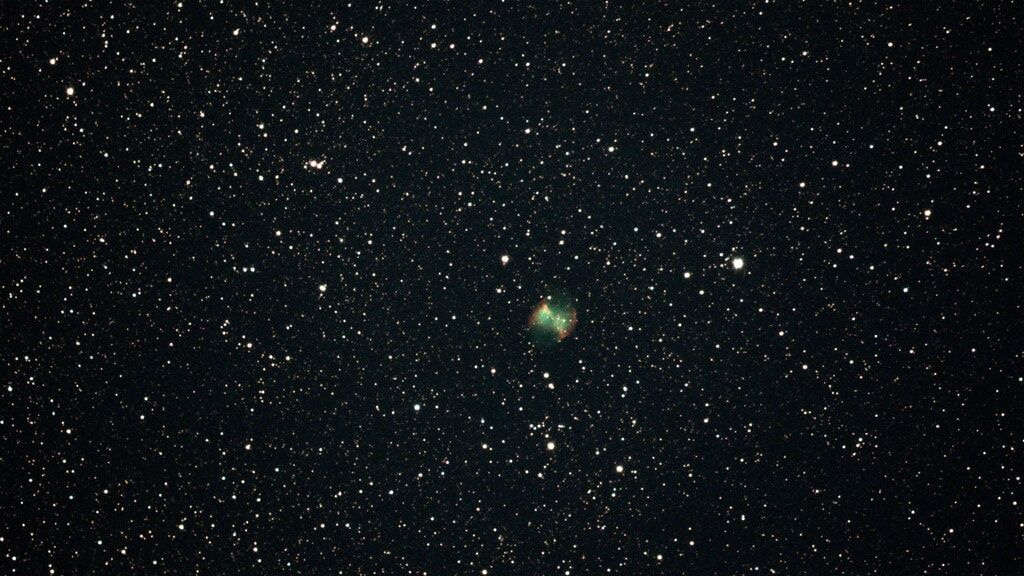
M27 Dumbbell 3s 105g 75-255h 10stk CLS filter (<1min) – FULL field of view
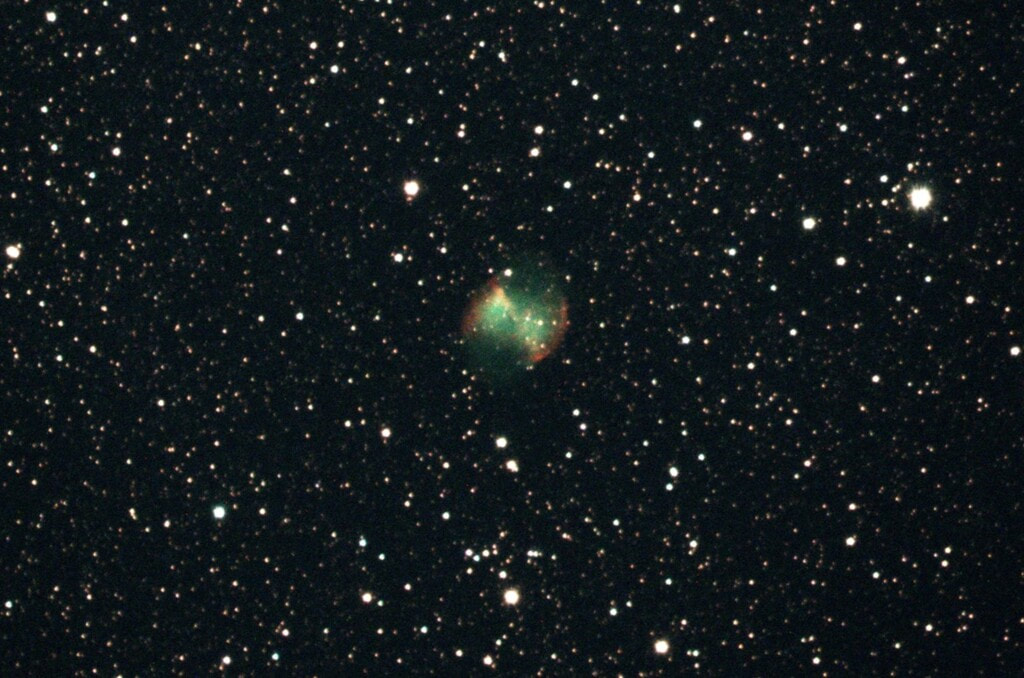
M27 Dumbbell 3s 105g 75-255h 10stk CLS filter (<1min total time) - Zoom/cropped image to see more detail.
Keep in mind that this is from my Bortle 6 southern skies in my hot and humid backyard in the summer. To combat the skyglow, I used an Astronomik CLS-2 Filter. I will probably need to wait for winter skies here to be able see fainter nebula (or use a different filter).
Based on this "first light" night, I expect my DS8300c will become the camera for my portable setup. Using the DS8300 felt like it was easier to get a nice view of a target.
Based on this "first light" night, I expect my DS8300c will become the camera for my portable setup. Using the DS8300 felt like it was easier to get a nice view of a target.
Second Night
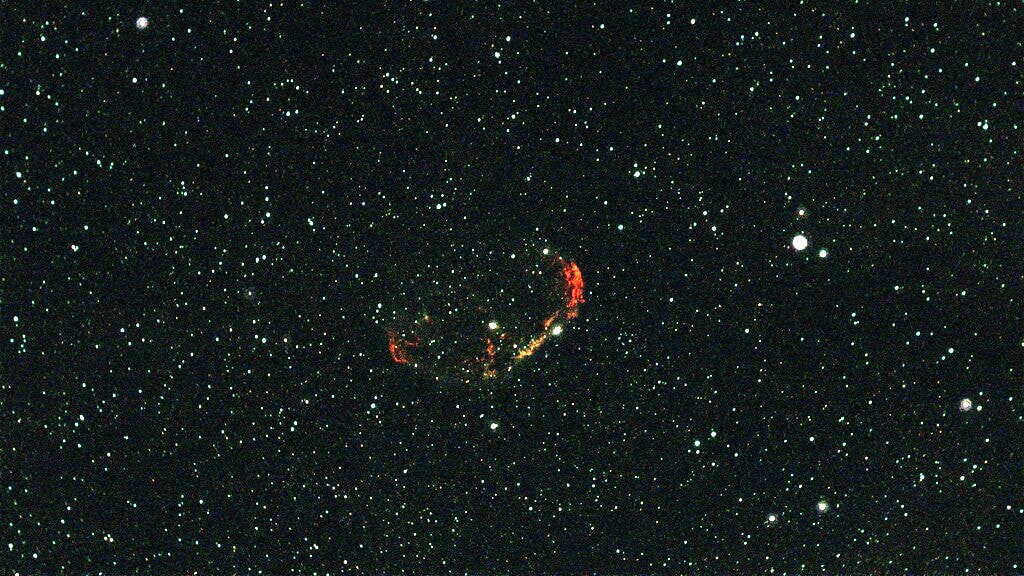
Amazingly I had a 2nd clear night to try out my new DS8300cTEC! It was a “little” cooler (79 degrees) and less humid (68%), but still not ideal viewing conditions in my backyard Bortle 6 skies. I decided to try some other filters that might help with faint nebula. I have a filter drawer on the Hyperstar C6 so it is easy to swap filters out. I just have to refocus whenever I remove or swap filters. I found the Crescent Nebula fits nicely in the DS8300c Field of View. It was easy to remove the CLS filter I used the previous night and try the L-Extreme filter followed by the L-eNhance filter. This is the first time I have used these filters and I need to learn how to adjust the colors a little better, but I was definitely pleased with how well I could see the Crescent Nebula without needing to zoom in.
Due to using these filters and my subject target, I switched to using 15 second exposures and stacked 10 images for the captures. Below are images using each of these filters. Even though each image took longer than the previous night due to the filters used, I timed it and found it just took a total of 3.5 min to stack the 10 images. This is still within near live “talking time” for outreach purposes and was interesting to watch as more images were stacked. Note: these images were “post processed” for 1 minute using MS Photo viewer to show up better on the web.
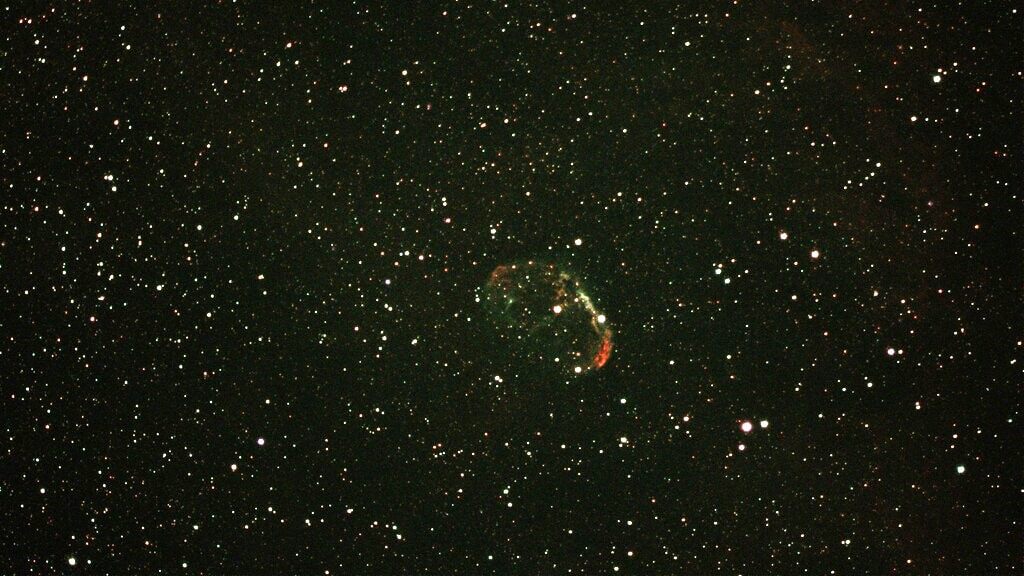
c27 Cresent Nebula 15s 150g 20-200h 10stk L-Extreme filter (=~3.5 min) pp
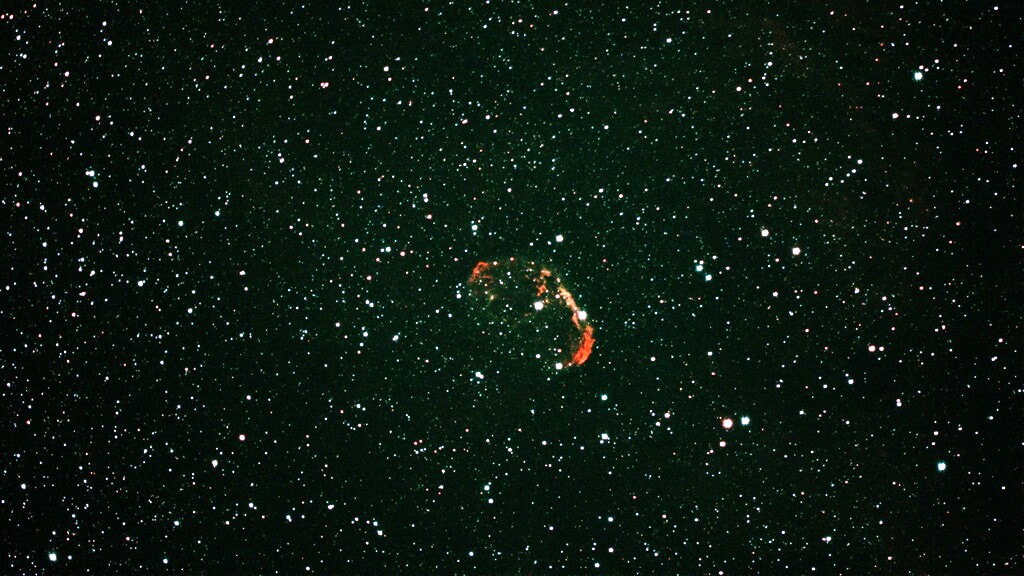
10 - c27 Cresent Nebula 15s 150g 14-200h 10stk L-eNhance filter (~3.5 min) pp
DS8300 moved to a small refractor
I saw posts where others have used the DS8300c on a small refractor. So, another night I decided to try my DS8300c on my small MCR-80ED refractor. Since my C6 with Hyperstar was set up on my equatorial mount on my pier, I just used my small portable SkyProdigy Alt-Az mount I had handy.
I saw posts where others have used the DS8300c on a small refractor. So, another night I decided to try my DS8300c on my small MCR-80ED refractor. Since my C6 with Hyperstar was set up on my equatorial mount on my pier, I just used my small portable SkyProdigy Alt-Az mount I had handy.

The tracking on this mount limited me to stacking 10 second exposures, which is fine for my outreach use. I looked at three targets: M13 Hercules Cluster, M27 – Dumbbell and C27 – Crescent Nebula. No filter was used for M13 and M27. I used the L-eNhance filter with C27. Again, these are at a Bortle 6 sky in a neighborhood with 80 degree night temps and very high humidity (95%+).
I mainly wanted to see the Field of View and image results on the 80mm f/5 refractor compared to using my C6 with Hyperstar f/2. This refractor and DS8300c seems to work fairly well for an extremely portable setup, and some typical targets fit nicely in its FOV. As expected, the C6/Hyperstar FOV will be better for larger nebula and f/2 exposures, while still being portable.
Below are 3 images using the 80mm refractor plus one image from C6/Hyperstar capture of m27 for comparison.
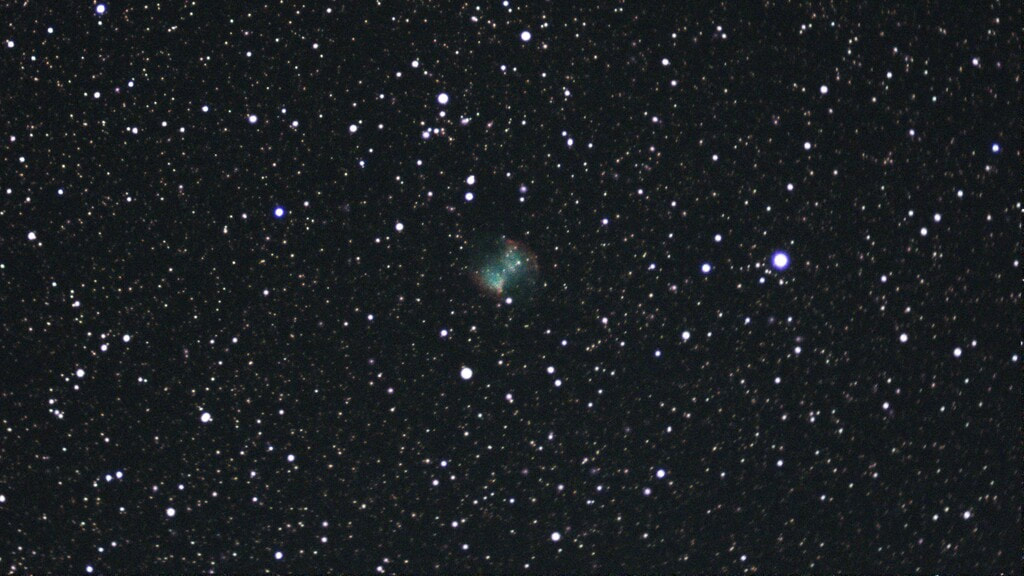
m27 Dumbbell 2.6s 140g 70-200h 20stk FULL field of view using no filter with 80mm refractor
m27 Dumbbell 3s 105g 75-255h 10stk FULL field of view using C6 with Hyperstar (comparison image)
m13 Hercules 2s 73g 42-255h 60stk using no filter with 80mm refractor
C27 Cresent Nebula 10s 150g 30-70h 10stk using L-eNhance filter with 80mm refractor
I think both of these setups will work for my portable use. If I need a really lightweight setup, I will use the MCR-80ED refractor and small Alt-Az SkyProdigy mount. I can run it all for several hours with the TEC cooling active using my ROCKPALS 250-Watt Portable Lithium Battery Pack with 12v DC and 110V AC Outlet.
The C6 with Hyperstar packs a lot in a small package and paired with an Evolution mount is also very portable. Since the Evolution has a built in Lithium battery, my battery pack could easily run the DS8300cTEC with cooling active and supplement my laptop with a 2nd monitor for a long time.
One other item I have come to appreciate about the DS8300cTEC is it’s power cable. It is noticeably smaller and more flexible than the power cables for the DS10cTEC and DS26cTEC that I have. The cable to the left in the picture below shows the small flexible portion of the power cable that goes into the back of the DS8300cTEC.

You can piggyback this small cable onto the USB cable (e.g. using Velcro) to make it seem like you are just routing a single cable to the back of the DS8300cTEC. One thing I have noticed with the DS8300cTEC is that I am not able to use it with my portable laptop with just the USB cable connected. Once I also plug in the power cable, MallincamSky shows the camera is connected. By having the small power cable paired up with the USB cable ahead of time, I can quickly route and plug them both in when assembling my portable setup and be able to use the fan and/or cooling as needed.
Below is a link to my post showing how to install the Hyperstar on the Celestron 6" telescope. It also shows my initial images using the DS10c on the C6 Hyperstar.
Click Here for more C6 Hyperstar details.
Below is a link to my post showing how to install the Hyperstar on the Celestron 6" telescope. It also shows my initial images using the DS10c on the C6 Hyperstar.
Click Here for more C6 Hyperstar details.
 RSS Feed