The Celestron StarSense AutoAlign (SSAA) accessory simplifies the alignment process and enables you to start your viewing quicker. This accessory was the subject of my first blog (see 11/16/2014). It has a feature that is particularly beneficial to Video Astronomy since the ability to center your target on the camera chip is very important.
Note that there is a difference between GoTo accuracy and tracking accuracy. For an equatorial mount, the better the mount is polar aligned toward the celestial pole, the better it will track. But that is a different SSAA topic. The better the star alignment, the better your GoTo’s will center your target. That’s what this topic is about.
The standard AutoAlign process captures images of 4 alignment areas of the sky and uses up to 100 stars in each area for its alignment calculations. If you slew to an object and find it is not centered very well, you can add a calibration reference for that region of the sky and then re-slew to the object. I sometimes find this is particularly helpful when your target object is in a sky region quite different from any of the prior image reference areas. Once you add a calibration reference, objects in that sky region will now be better centered after a GoTo selection. The StarSense can use up to 10 calibration reference areas, so I mainly use this feature when I have not added a calibration reference in a particular area of the sky.
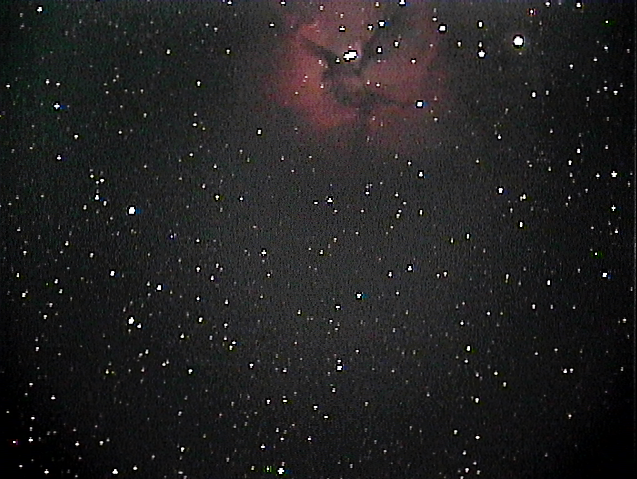
Here is an example of an object to the South that is not near any of my initial alignment areas. After the initial GoTo slew finished, the target was near the top of my field of view.
Note that there is a difference between GoTo accuracy and tracking accuracy. For an equatorial mount, the better the mount is polar aligned toward the celestial pole, the better it will track. But that is a different SSAA topic. The better the star alignment, the better your GoTo’s will center your target. That’s what this topic is about.
The standard AutoAlign process captures images of 4 alignment areas of the sky and uses up to 100 stars in each area for its alignment calculations. If you slew to an object and find it is not centered very well, you can add a calibration reference for that region of the sky and then re-slew to the object. I sometimes find this is particularly helpful when your target object is in a sky region quite different from any of the prior image reference areas. Once you add a calibration reference, objects in that sky region will now be better centered after a GoTo selection. The StarSense can use up to 10 calibration reference areas, so I mainly use this feature when I have not added a calibration reference in a particular area of the sky.
Here is an example of an object to the South that is not near any of my initial alignment areas. After the initial GoTo slew finished, the target was near the top of my field of view.
I then used the StarSense Hand Control to initiate adding a reference calibration which did not take very long, and then re-selected the same target. After the GoTo slew finished, the target was now near the center of my field of view.
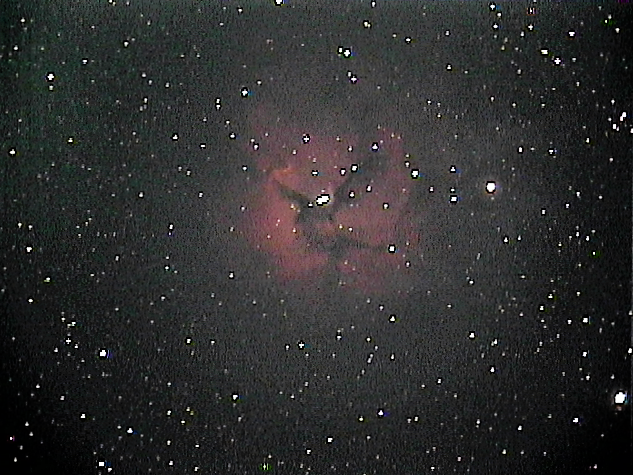
The only difference in these two images is the addition of a reference calibration. I did not make any manual centering adjustments.
The SSAA manual has a section that describes how to add a calibration reference. Here is my mark up of that section if you have already slewed to a target and simply want to better center it by adding a calibration reference of its region of the sky without making any manual centering adjustments. Note that there is no need to try to manually center a target before adding the calibration point.
The SSAA manual has a section that describes how to add a calibration reference. Here is my mark up of that section if you have already slewed to a target and simply want to better center it by adding a calibration reference of its region of the sky without making any manual centering adjustments. Note that there is no need to try to manually center a target before adding the calibration point.
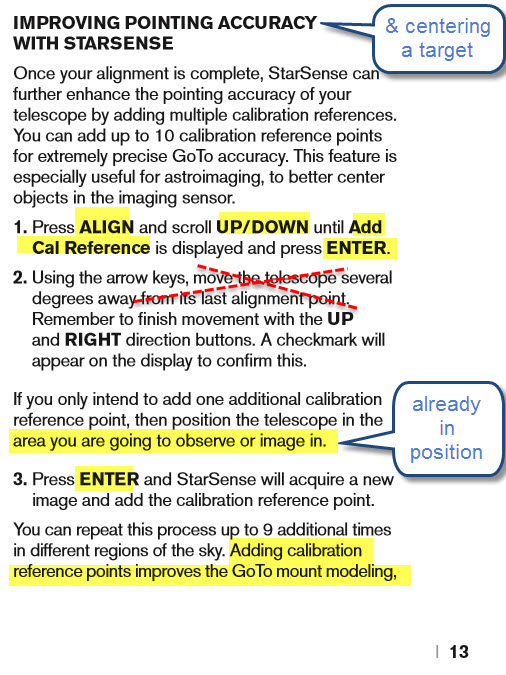
For clarity, here are my own set of steps for adding a calibration reference to better center a target after you have initially slewed to it.
1. Press the Align button
2. Scroll up/down until you see Add Cal Reference
3. Press Enter
4. Press Enter again. (There is no need to perform step 2 as described in the manual. You are already pointed at the sky area of interest. And if you have not performed any manual position adjustments there is no need to press the Up and Right direction buttons.)
5. You will then see messages on the LCD screen as the SSAA acquires an image of that area of the sky, finds up to 100 stars in the image, computes a solution of what it is seeing and adds it as an additional calibration reference.
6. When finished, press Back and use the hand controller to re-select your target and initiate a second GoTo.
When the new slew finishes, the target should now be better centered in your field of view.
 RSS Feed